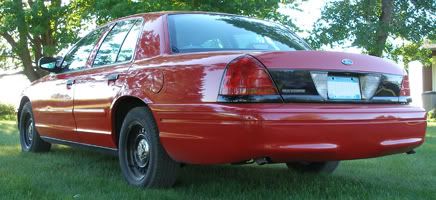
For those of you who own '79-'82 Panthers, or those of you with 351W-equipped police cars, you're probably at least somewhat familiar with that goofy looking carburetor that you keep hidden underneath your air cleaner.
As much as you may dread it, the time may come when you need to rebuild it. After all, 25-30 years' worth of gunk doesn't do much for the proper functioning of a carburetor. Now I know you've all heard the horror stories of how awful these things are to work on, but I'm here to tell you that it's really not that bad. Let me show you the innards of these things so that when you go to rebuild yours, maybe you'll have slightly better luck with Ford's little mechanical marvel--the Variable Venturi.
NOTE: This is NOT an introductory course to carb cleaning. You do have to have some idea of what you're doing to begin with; this will just give you an idea of what to expect when ripping into a VV.
One little tip to start off when you're removing the carb from the car. The passenger side rear nut is a major PITA to get off if you don't notice the little notch in the body directly above it. That notch is sized just perfectly so that you can use a 1/4" ratchet, extension, and socket (7/16" IIRC) to get it off. I didn't realize that when I first had mine off, and it was a huge pain. Not bad at all with the 1/4" drive stuff, though.
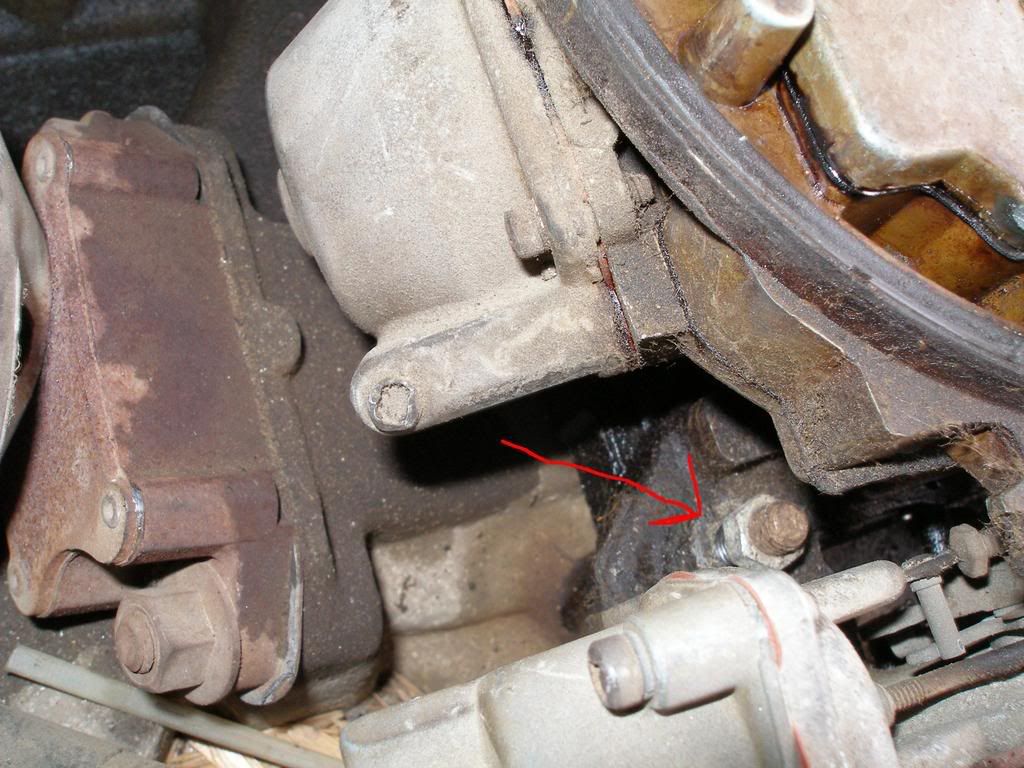
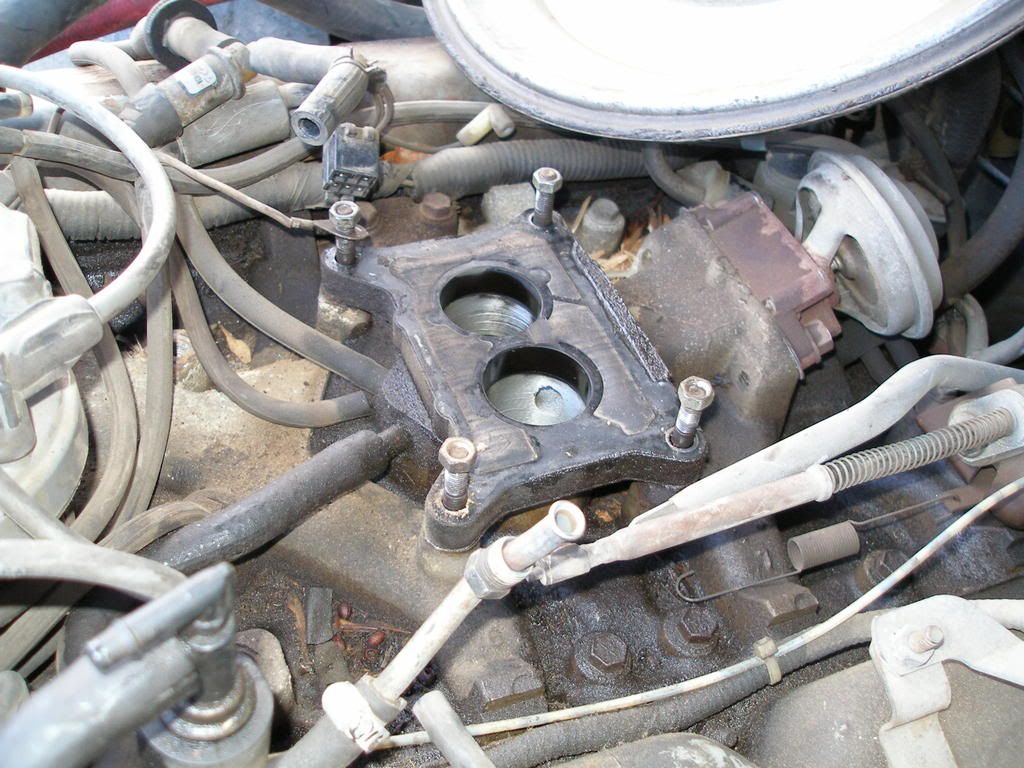
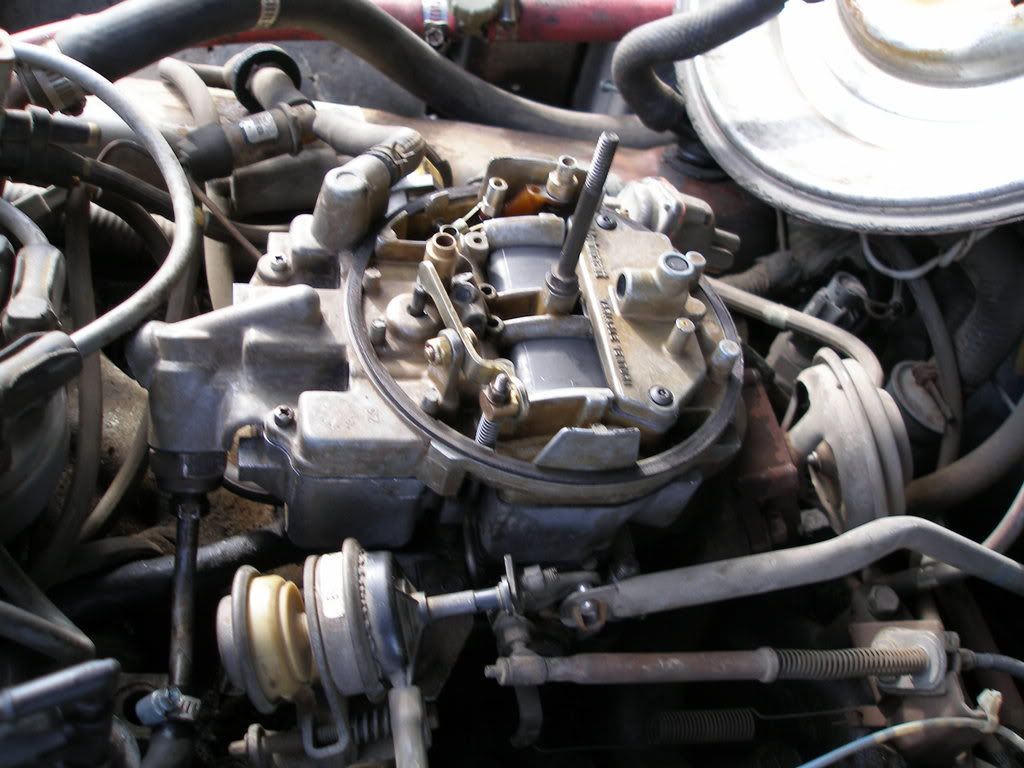
Once you get it off, note that there's a spacer beneath the carb--what you see in this picture is NOT the intake manifold! You need to take that spacer off and scrape the gaskets off of both sides. There's one on both the top and the bottom, and you'll want to replace 'em both.
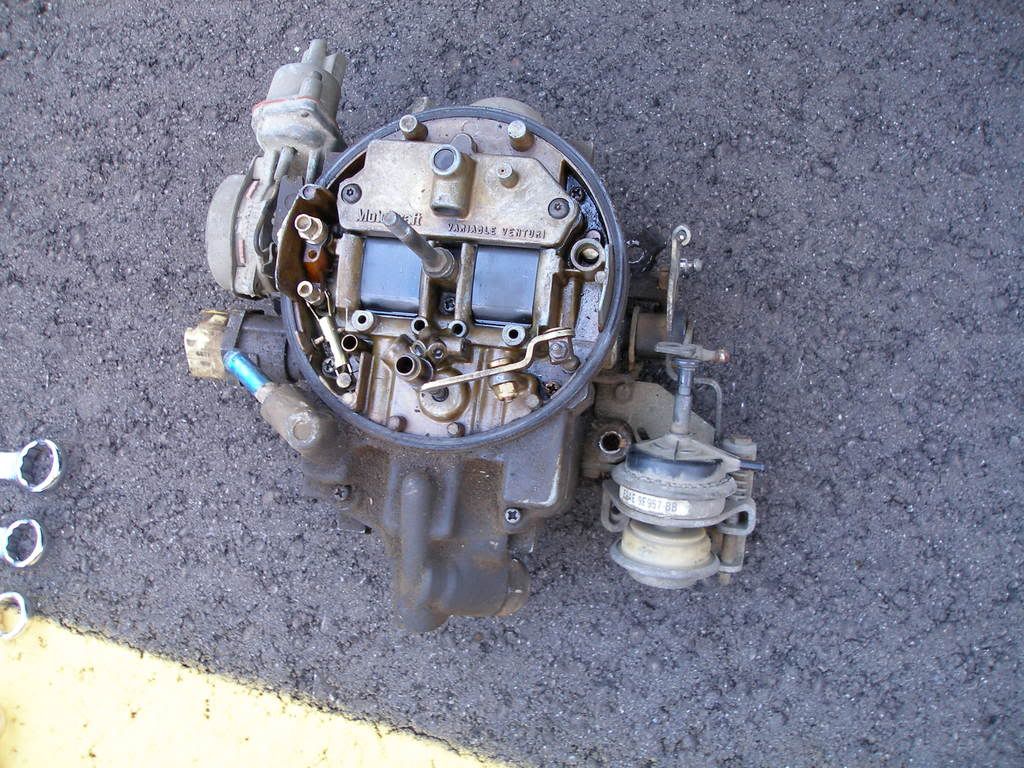
Now, picture of the carburetor itself, removed from the car. The little black door thingies at the top are the venturi valves. Their position is determined by engine vacuum so that at idle, they're nearly closed, which effectively decreases the venturi size, thus increasing venturi velocity, leading to better fuel atomization. Basically, it's supposed to function like a tiny carb at idle and a big carb at high speeds.
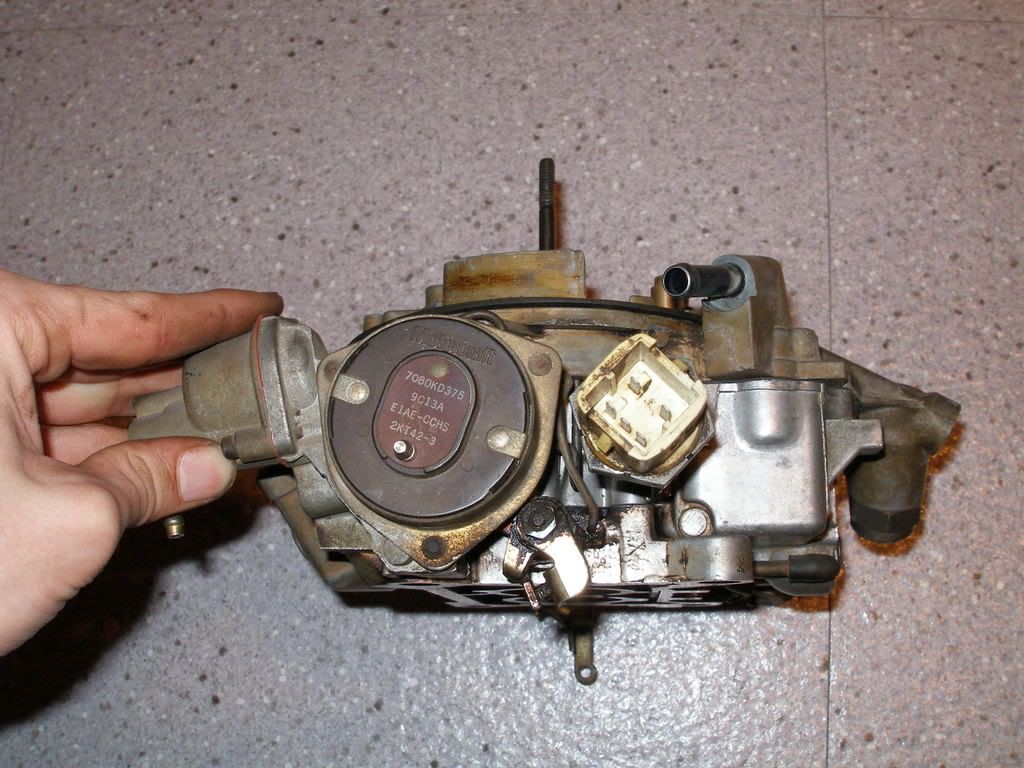
Passenger side of the carb. The electrical connector near the front is where the plug goes in for the computer control system. That whole piece just unscrews from the side of the body (I think I just grabbed mine with a set of Channelocks and it came right out, nothing challenging). You'll definitely want to get it out before you drop the body in the carb cleaner, because I highly doubt the chemicals in that stuff would be doing it any favors.
To the left of that connector you can see part of the cold enrichment system, and my hand is on the small vacuum diaphragm that controls it. I don't recall exactly what its function is, but anyway, that's what it is.
This is the rear of the carburetor. The big housing right in the center is the vacuum diaphragm that controls the venturi valves (more on that later). The smaller one on the right is the vacuum diaphragm for the cold enrichment system again.
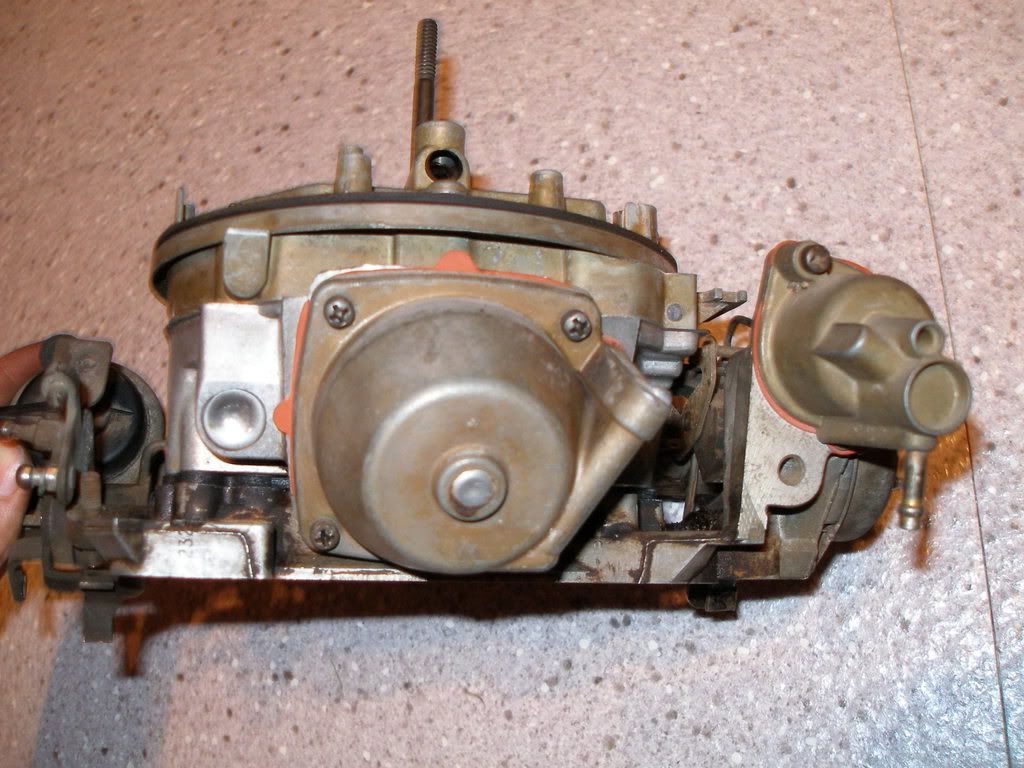
Driver's side of the carb...only thing remotely worth mentioning here is the dash pot on the left, which, incidentally, is disconnected on mine. Don't really need it there.

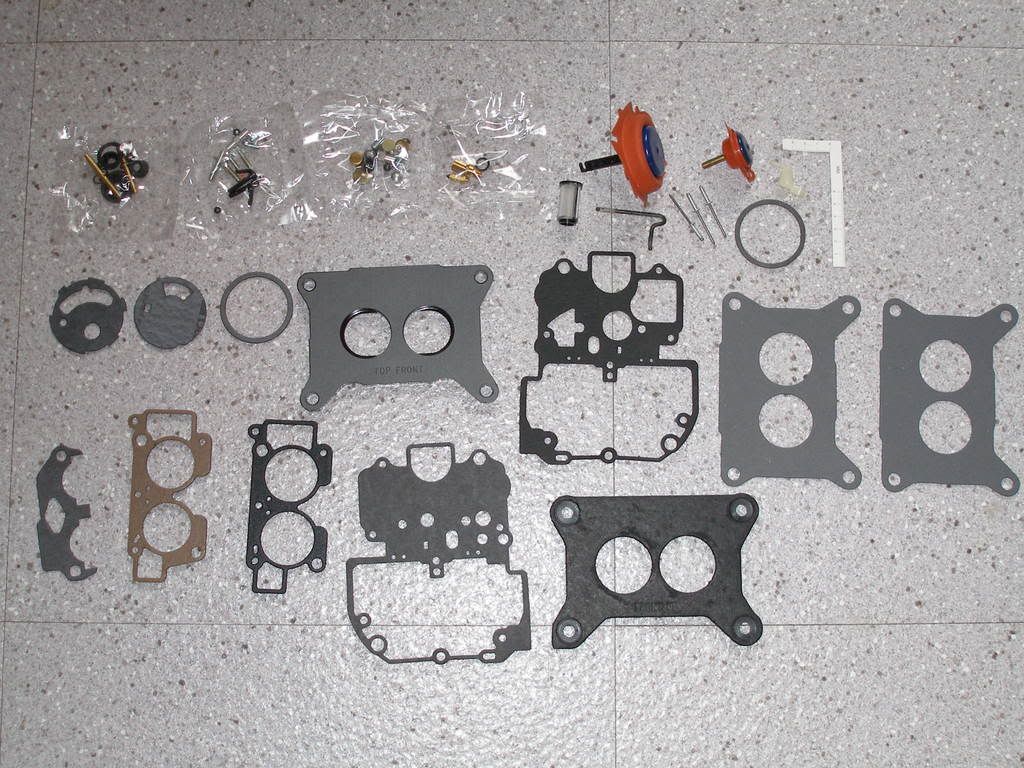
Here's what my rebuild kit consisted of. It's the G.P. Sorenson kit, so if you get a different brand, yours may be a bit different. That said, however, I'd certainly recommend this brand since it seemed to be good quality, and is one of the most complete kits I've ever seen--it even came with some new hardware! This was about 41 bucks at Advance Auto.
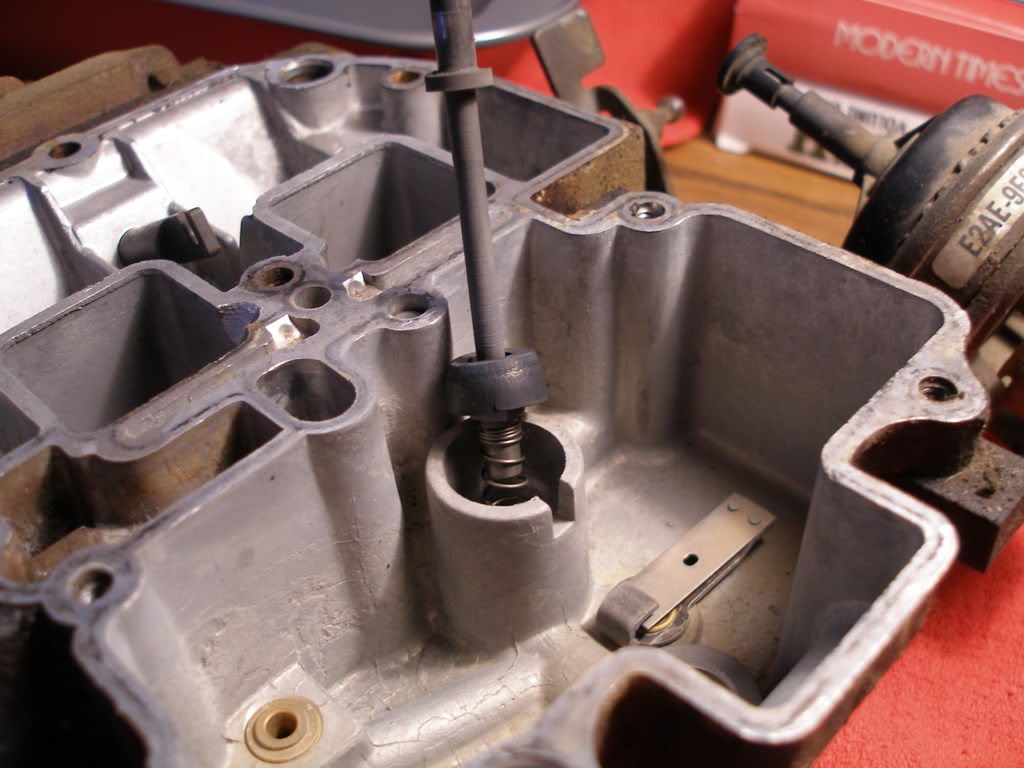
Once you get the top off (I'm not explaining how to do that part because if you can't figure it out for yourself you really shouldn't be tackling this anyway), this is what you'll see. Note the rod sticking up in the middle--that's the accelerator pump. The little umbrella-shaped rubber piece on there tends to get dried out and cracked after awhile, and then the pump doesn't work too well. That's what happened on mine, and it's part of what inspired me to rebuild it in the first place.
The large brass jet below it is for the cold enrichment system. Instead of having a traditional choke system, where the air flow is cut off in order to make the carb suck more fuel, the Variable Venturi uses an electrical choke-style mechanism that operates a metering rod that goes into that jet. In cold mode, that rod is lifted up out of the jet, which enriches the mixture. As the bimetal spring warms up, the rod slowly goes back down into the jet, which gradually leans out the mixture. It's doing the same thing as a regular choke does, except that it's working the problem from the other side.
Also notice that the venturis are not round, but square. Seems strange, but hey, it works.
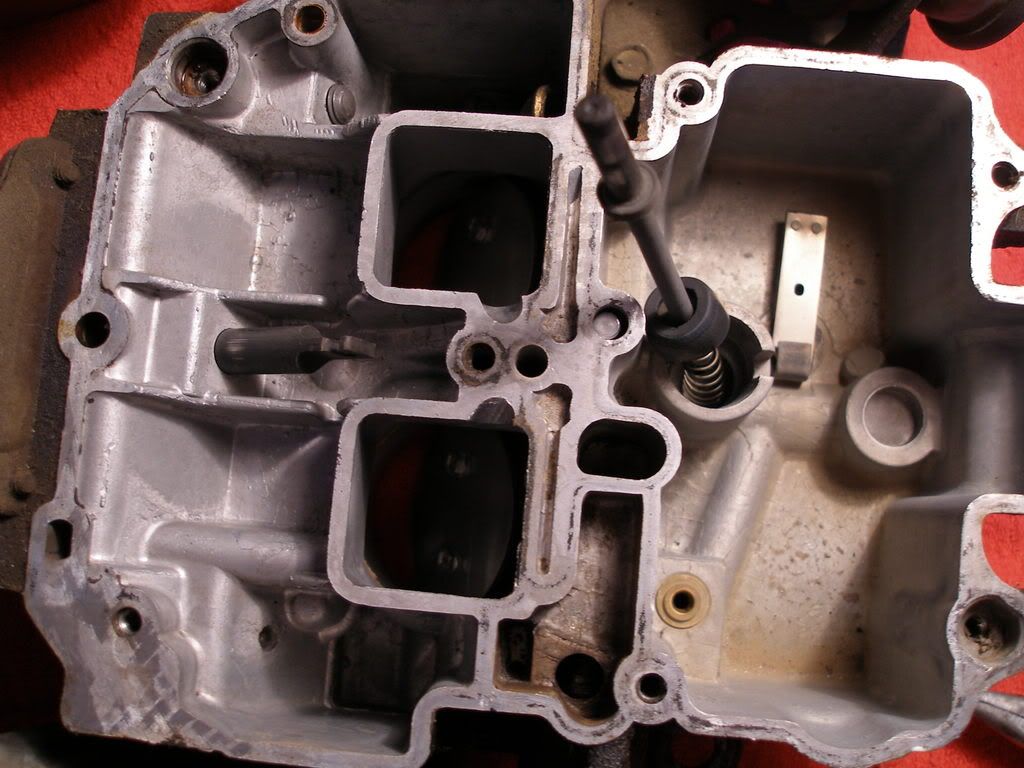
Another view of the bottom portion. You can see the bad rubber seal on the accelerator pump rod more easily here.
Here's the underside of the top portion of the carb. The venturi valves are held in there by a pair of tubes that are tapered on the inside and split on the outside, and then there's a tapered pin that goes into each of the tubes and holds everything in place. Just knock the pins out, pull the little tubes out, and the venturi valve assembly will come free. Just be careful when removing them so that the rods sticking out of each door don't get damaged.
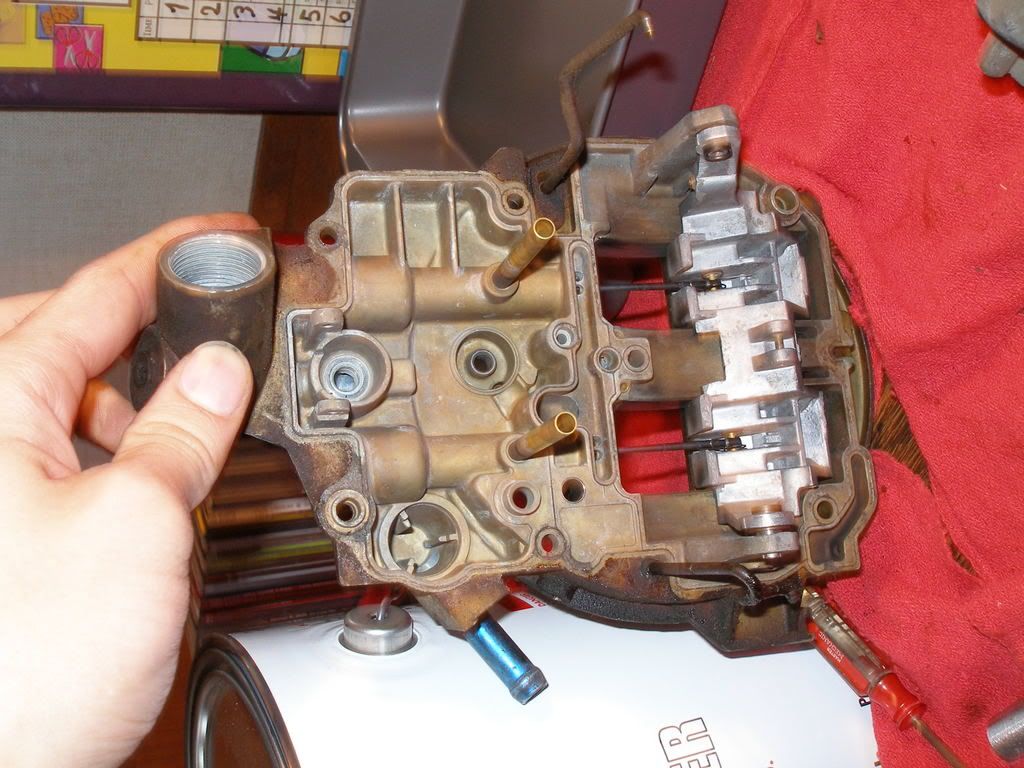
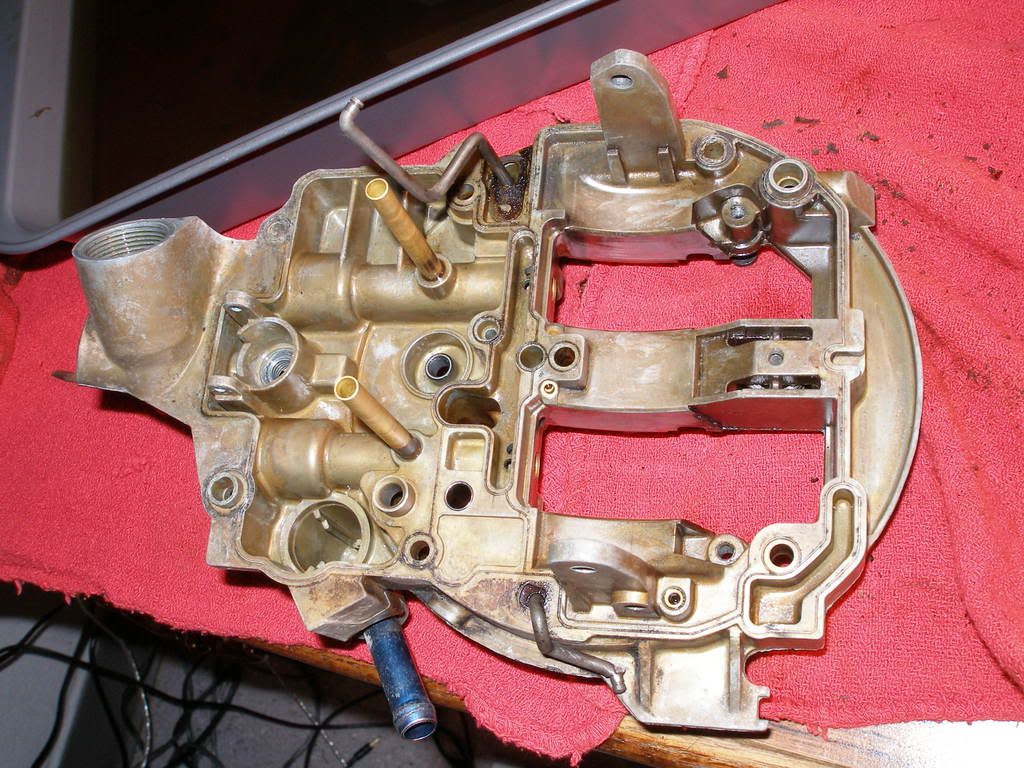
Top portion with the venturi valves removed:
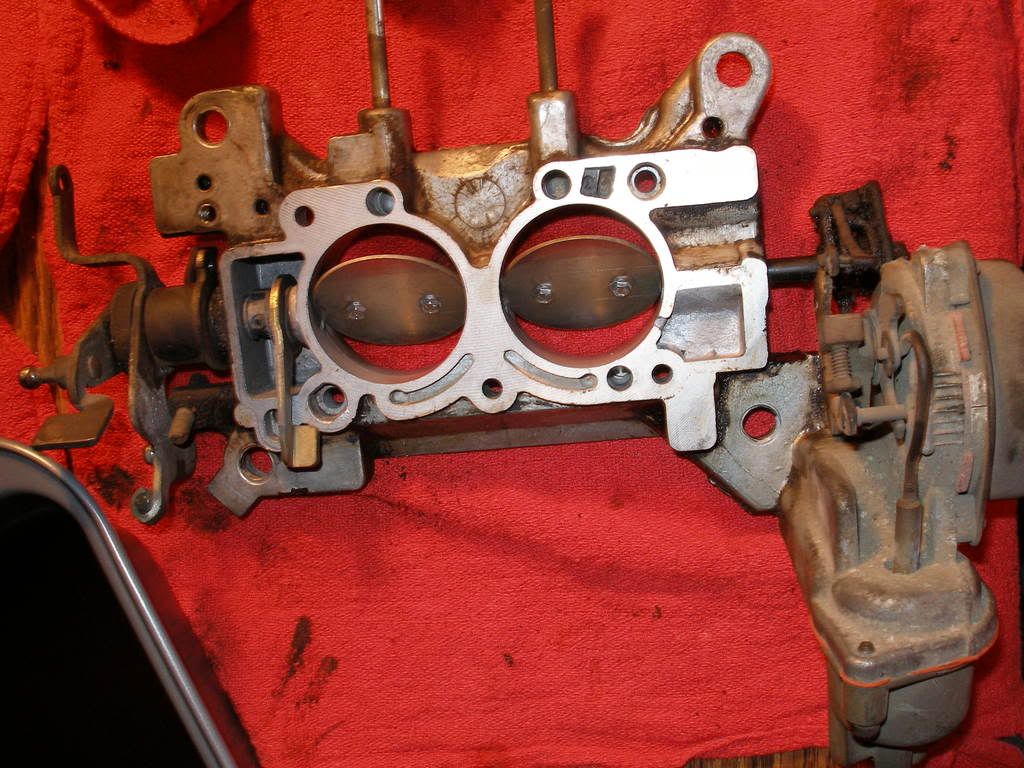
Here's the throttle body removed from the bottom portion. The carb is basically in three big parts. When I cleaned mine, I didn't put this in the carb cleaner because I didn't want to wash the lubricant out of the throttle shaft bores, so I just cleaned it by hand with a rag dipped in the cleaning solution.
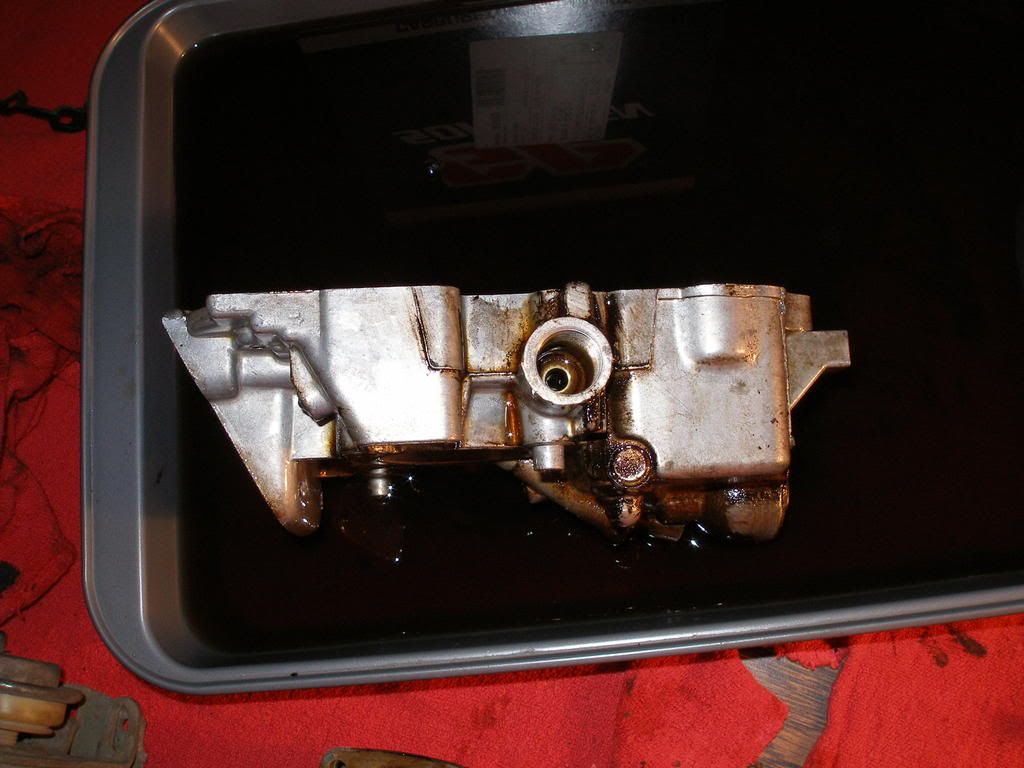
Here's the main body in the cleaning solution. The threaded hole in the center is where the electronic controlled portion of the carburetor goes in.


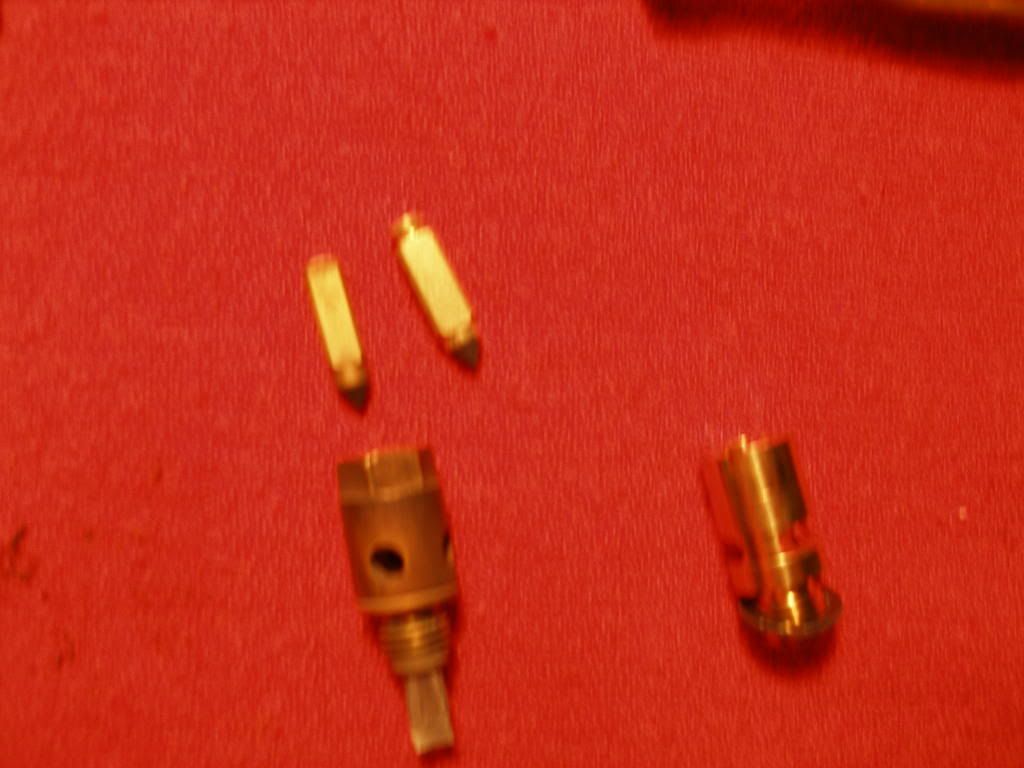
Something to note when you install the new float valve--it may look slightly different from the original. Don't be alarmed, the new one will work fine. Pictured on the left is the original valve and seat, on the right is the new one. I was a bit dismayed by the fact that the new seat didn't have the integral screen like the old one did, but it's been working fine, so I won't complain.
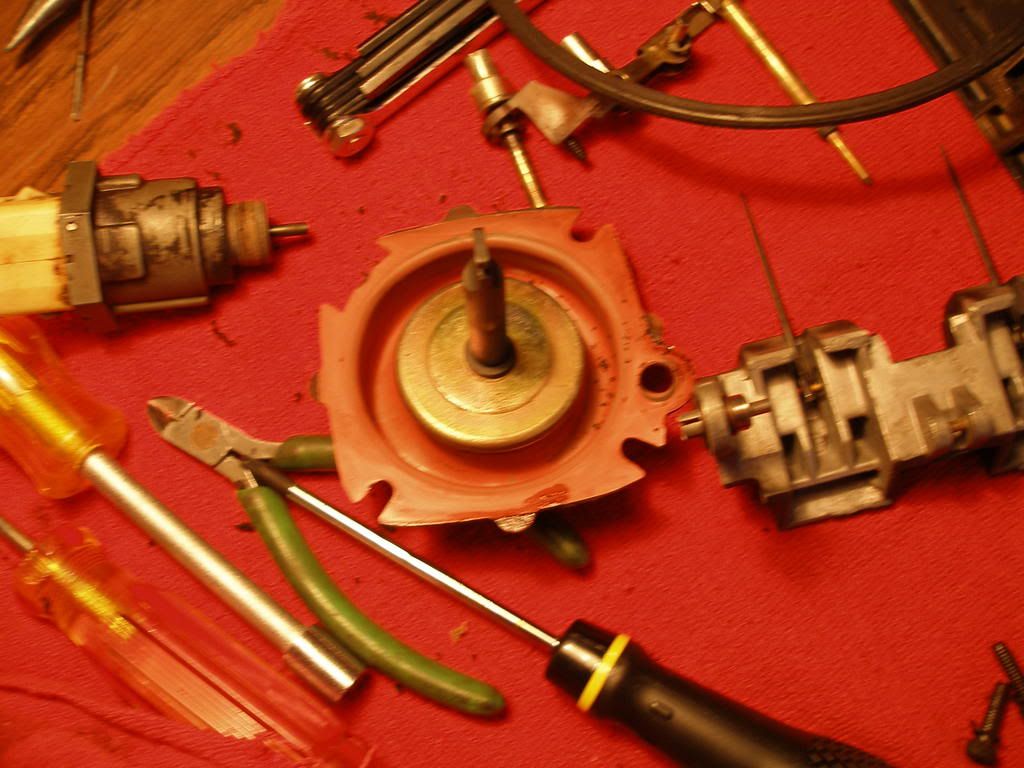
The next two pictures are the old vacuum diaphragm that controls the venturi valves.
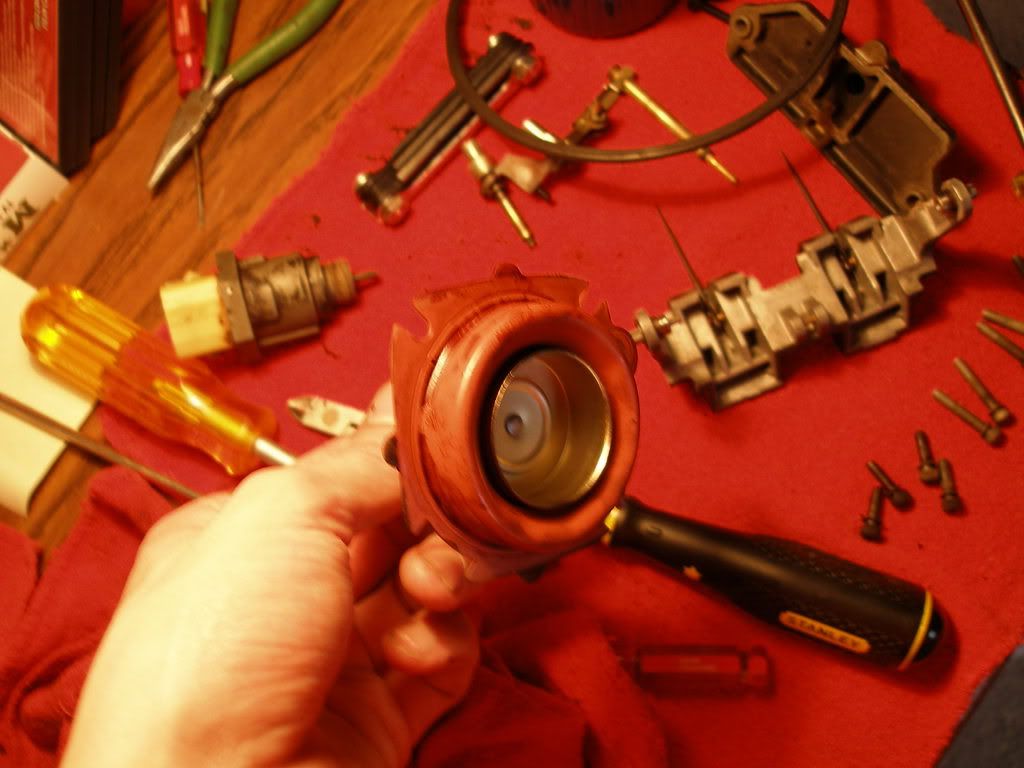
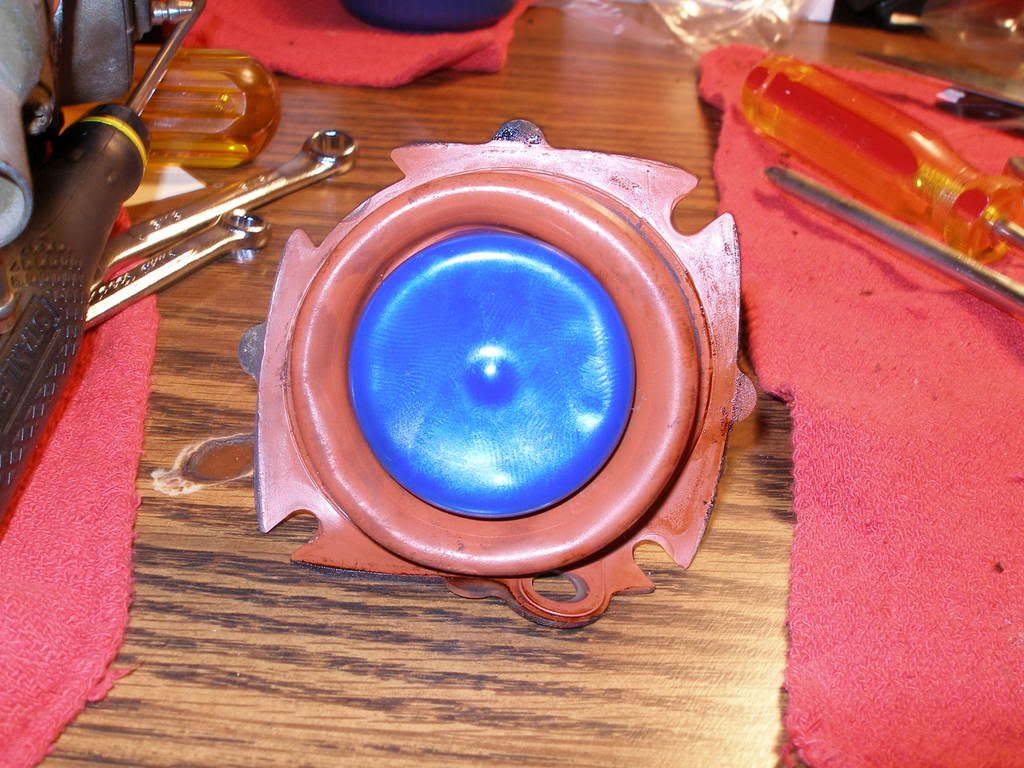
One thing to note when installing the new diaphragm--the new one will come with this blue rubber piece on it as part of the packing material. Make sure to remove it before putting it all together, or the venturi valves won't be able to open all the way (I made that mistake when I first put mine together and was a bit confused at first as to why they wouldn't completely open).
Once you get it all put back together and reinstalled on the engine, it should start right up as soon as the bowl fills up, assuming you didn't screw anything up too badly.
Hope this helps to clear away some of the mysteriousness of the Variable Venturi, and encourage those who have one to go ahead and try their hand at rebuilding it rather than just letting someone else do it. As long as you have some idea of what you're doing and have a decent selection of hand tools, you can handle rebuilding one of these.
As much as you may dread it, the time may come when you need to rebuild it. After all, 25-30 years' worth of gunk doesn't do much for the proper functioning of a carburetor. Now I know you've all heard the horror stories of how awful these things are to work on, but I'm here to tell you that it's really not that bad. Let me show you the innards of these things so that when you go to rebuild yours, maybe you'll have slightly better luck with Ford's little mechanical marvel--the Variable Venturi.
NOTE: This is NOT an introductory course to carb cleaning. You do have to have some idea of what you're doing to begin with; this will just give you an idea of what to expect when ripping into a VV.
One little tip to start off when you're removing the carb from the car. The passenger side rear nut is a major PITA to get off if you don't notice the little notch in the body directly above it. That notch is sized just perfectly so that you can use a 1/4" ratchet, extension, and socket (7/16" IIRC) to get it off. I didn't realize that when I first had mine off, and it was a huge pain. Not bad at all with the 1/4" drive stuff, though.

Once you get it off, note that there's a spacer beneath the carb--what you see in this picture is NOT the intake manifold! You need to take that spacer off and scrape the gaskets off of both sides. There's one on both the top and the bottom, and you'll want to replace 'em both.

Now, picture of the carburetor itself, removed from the car. The little black door thingies at the top are the venturi valves. Their position is determined by engine vacuum so that at idle, they're nearly closed, which effectively decreases the venturi size, thus increasing venturi velocity, leading to better fuel atomization. Basically, it's supposed to function like a tiny carb at idle and a big carb at high speeds.

Passenger side of the carb. The electrical connector near the front is where the plug goes in for the computer control system. That whole piece just unscrews from the side of the body (I think I just grabbed mine with a set of Channelocks and it came right out, nothing challenging). You'll definitely want to get it out before you drop the body in the carb cleaner, because I highly doubt the chemicals in that stuff would be doing it any favors.
To the left of that connector you can see part of the cold enrichment system, and my hand is on the small vacuum diaphragm that controls it. I don't recall exactly what its function is, but anyway, that's what it is.

This is the rear of the carburetor. The big housing right in the center is the vacuum diaphragm that controls the venturi valves (more on that later). The smaller one on the right is the vacuum diaphragm for the cold enrichment system again.

Driver's side of the carb...only thing remotely worth mentioning here is the dash pot on the left, which, incidentally, is disconnected on mine. Don't really need it there.

Here's what my rebuild kit consisted of. It's the G.P. Sorenson kit, so if you get a different brand, yours may be a bit different. That said, however, I'd certainly recommend this brand since it seemed to be good quality, and is one of the most complete kits I've ever seen--it even came with some new hardware! This was about 41 bucks at Advance Auto.

Once you get the top off (I'm not explaining how to do that part because if you can't figure it out for yourself you really shouldn't be tackling this anyway), this is what you'll see. Note the rod sticking up in the middle--that's the accelerator pump. The little umbrella-shaped rubber piece on there tends to get dried out and cracked after awhile, and then the pump doesn't work too well. That's what happened on mine, and it's part of what inspired me to rebuild it in the first place.
The large brass jet below it is for the cold enrichment system. Instead of having a traditional choke system, where the air flow is cut off in order to make the carb suck more fuel, the Variable Venturi uses an electrical choke-style mechanism that operates a metering rod that goes into that jet. In cold mode, that rod is lifted up out of the jet, which enriches the mixture. As the bimetal spring warms up, the rod slowly goes back down into the jet, which gradually leans out the mixture. It's doing the same thing as a regular choke does, except that it's working the problem from the other side.
Also notice that the venturis are not round, but square. Seems strange, but hey, it works.

Another view of the bottom portion. You can see the bad rubber seal on the accelerator pump rod more easily here.

Here's the underside of the top portion of the carb. The venturi valves are held in there by a pair of tubes that are tapered on the inside and split on the outside, and then there's a tapered pin that goes into each of the tubes and holds everything in place. Just knock the pins out, pull the little tubes out, and the venturi valve assembly will come free. Just be careful when removing them so that the rods sticking out of each door don't get damaged.

Top portion with the venturi valves removed:

Here's the throttle body removed from the bottom portion. The carb is basically in three big parts. When I cleaned mine, I didn't put this in the carb cleaner because I didn't want to wash the lubricant out of the throttle shaft bores, so I just cleaned it by hand with a rag dipped in the cleaning solution.

Here's the main body in the cleaning solution. The threaded hole in the center is where the electronic controlled portion of the carburetor goes in.


Something to note when you install the new float valve--it may look slightly different from the original. Don't be alarmed, the new one will work fine. Pictured on the left is the original valve and seat, on the right is the new one. I was a bit dismayed by the fact that the new seat didn't have the integral screen like the old one did, but it's been working fine, so I won't complain.

The next two pictures are the old vacuum diaphragm that controls the venturi valves.


One thing to note when installing the new diaphragm--the new one will come with this blue rubber piece on it as part of the packing material. Make sure to remove it before putting it all together, or the venturi valves won't be able to open all the way (I made that mistake when I first put mine together and was a bit confused at first as to why they wouldn't completely open).

Once you get it all put back together and reinstalled on the engine, it should start right up as soon as the bowl fills up, assuming you didn't screw anything up too badly.

Hope this helps to clear away some of the mysteriousness of the Variable Venturi, and encourage those who have one to go ahead and try their hand at rebuilding it rather than just letting someone else do it. As long as you have some idea of what you're doing and have a decent selection of hand tools, you can handle rebuilding one of these.

