Announcement

Collapse
No announcement yet.

kishy's 1984 Town Car

Collapse
X
 
  • Filter
  • Time
  • Show
Clear All
new posts

    #16
    Originally posted by gadget73 View Post
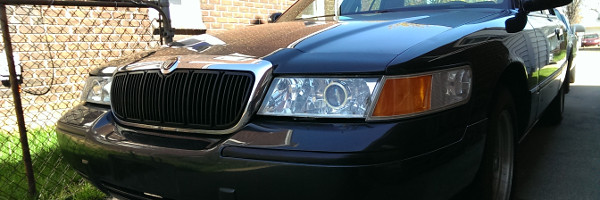
    I was going to ask wtf you were talking about with the roundie lamps, then I remembered you have a Mark VI front end.


    Full top is cheaper than half measures to replace. Its one piece of vinyl and no headliner removal. The half top is I think 5 or 6 pieces plus the headliner comes out. One for the roof, the rest are on the "belt" itself which is apparently a giant pain in the ass to re-do. One thing I do have that you don't is very difficult to find rear window trim. The half tops frenched in the rear glass, I have all of it with chrome trim that only the cheap of the cheap cars got.

    On the upside, that rust hole that got repaired with a new A pillar is perfectly hidden under the top. The bodywork under there isn't flawless but since there is vinyl over it there wasn't any need for it to be paint quality.
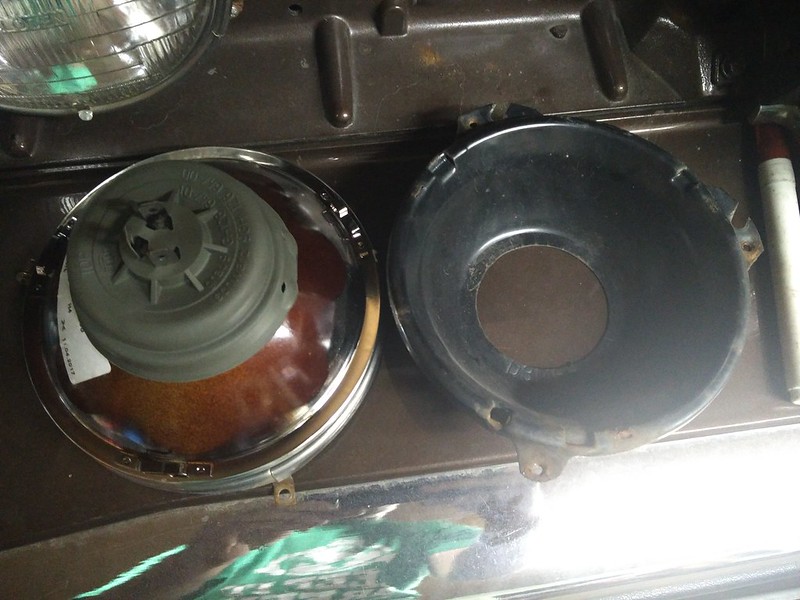
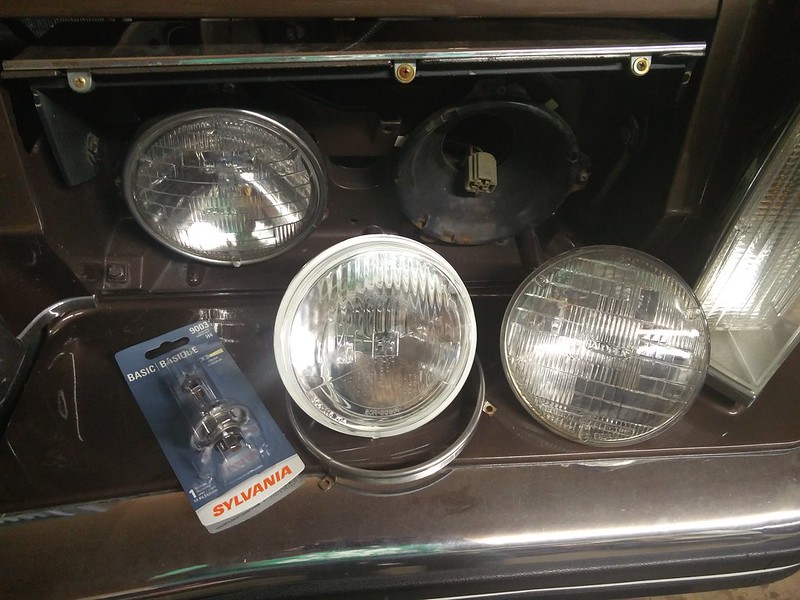
    Yeeeeeahhh, that damned header panel swap...I have oodles of 4656 hanging around, but not a single spare 5006. As it happens the lamps on the car were 4000s, which dates them to the 80s I'm pretty sure. Yikes.

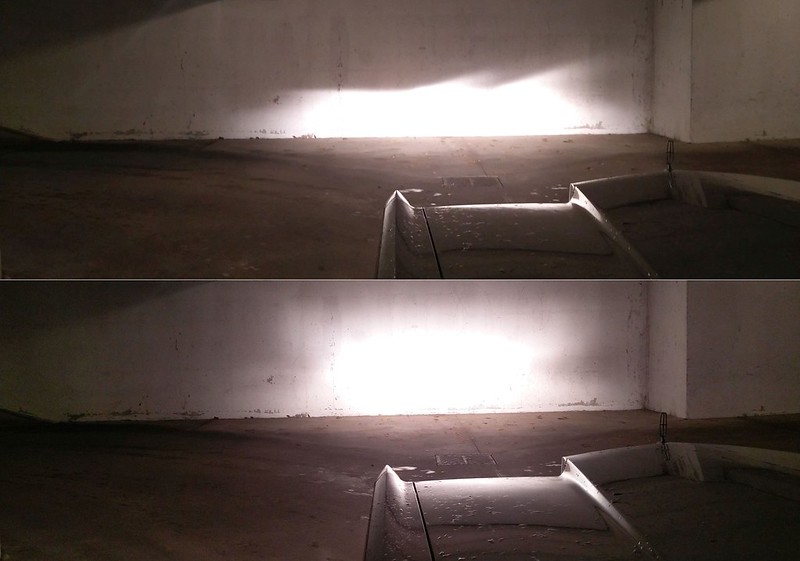
    The Hella E-codes from Summit are on, and not a moment too soon, because the second 4000 burned out as I was leaving to go get bulbs to put in the new housings. They cast what I'd call very even light with a great cutoff. It's not just all a big puddle of light right in front of the car anymore. I used Sylvania's "basic" 9003 bulbs, nothing fancy, just needed functional lighting.

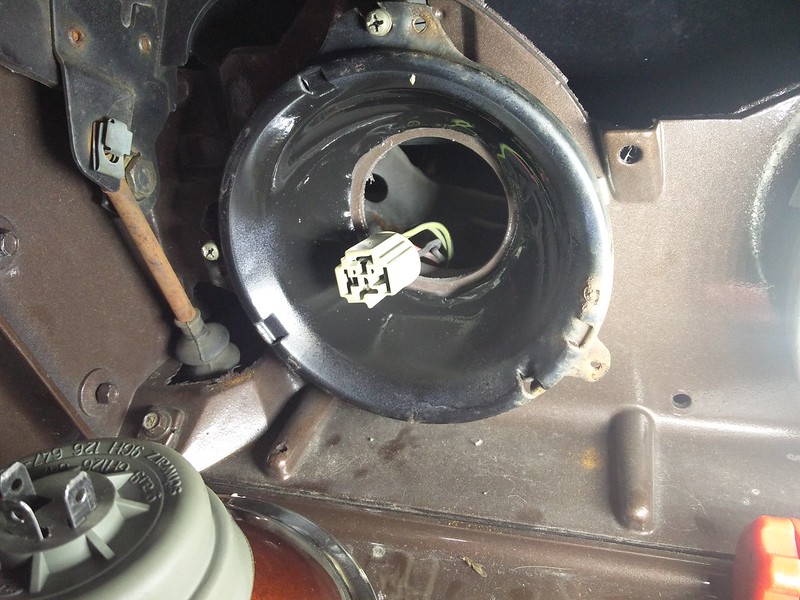
    I had to cut some metal out of the headlight buckets so the rubber boot on the back of the Hellas would fit in place, which is important because the lamp is not watertight without the seal in place. I also had to move a couple terminals around as is documented elsewhere already.

    While in there, I also moved the diodes for the headlamp door setup to the trigger side of the relays instead of the switched side. In doing so I've introduced a new weird problem. I'm suspecting the headlamp door box must have a capacitor in it because now something is back-feeding the relay for the low beams keeping the lights on for about 5 seconds even if autolamp is off (keep in mind I did the latter of Sly's remark below)

    Originally posted by sly View Post
    The door control module works off the switch OR the autolamp by being in-line with the headlight switch output for the low beams before it gets to the MFS IIRC. That way it stays closed for just parking lights but opens for the headlights, low or high. It's just a signal tap for 12V from the headlamp switch so you should only need one wire through the firewall or if you want to keep from doing anything through the firewall and load it all under the hood, put 2 signal or rectifier diodes rated at least 20V (most are rated way more anyhow) and quarter watt should be plenty and point the line towards the module and the other end of the two diodes to the low and high beam lines to the headlights. You may want to provide the module with a foam filter over the vents for reliability.
    So, since the second method with the diodes is not working optimally I'm going to tap into the wire in the dash and clean up the wiring under the hood where my relays are. Clearly there's a reason Ford did it how they did it and my homebrew wiring hacks are revealing the bugs that motivated them back when the circuit was designed.


    Still need to perfect the aim but things are working well, I'd say.

    Panthers: 83 GM 2dr | 84 TC | 85 CS | 88 TC | 91 GM
    Not Panthers: 85 Ranger | Ranger trailer | 91 Acclaim | 92 Jaaag | 05 Focus
    Gone: 97 CV | 83 TC | 04 Focus | 86 GM
    | Junkyards

    Comment


      #17
      I am a fan of that flute pattern.

      I think you need to adjust the right headlight to the right. It should provide much more shoulder coverage.
      Not as sure about the left going more left but you may try that.
      The idea with this flute pattern is to keep the light low into the left into oncoming traffic and that triangle kick up of light goes straight down the road for more distance and the right beam goes far down the right shoulder.
      You have to play with the height after you get the right/left in range as it must be right for it all to come together optimally for you and other traffic, oncoming and in front of you.
      It looks like you have the height matched right and left, this will become very clear when you kick the right to the right, which is good but overall height is a hard setting is to tell from pics.
      Last edited by jaywish; 10-24-2017, 11:34 PM.
      03 Marauder DPB, HS, 6disk, Organizer Mods> LED's in & Out, M&Z rear control arms, Oil deflector, U-Haul Trans Pan, Blue Fuzzy Dice
      02 SL500 Silver Arrow
      08 TC Signature Limited, HID's Mods>06 Mustang Bullet Rims 235/55-17 Z rated BFG G-Force Comp-2 A/S Plus, Addco 1" rear Sway, Posi Carrier, Compustar Remote Start, floor liners, trunk organizer, Two part Sun Visors, B&M Trans drain Plug, Winter=05 Mustang GT rims, Nokian Hakkapeliitta R-2 235/55-17
      12 Escape Limited V6 AWD, 225/65R17 Vredestein Quatrac Pro, Winter 235/70-16 Conti Viking Contact7 Mods>Beamtech LED headlight bulbs, Husky floor liners

      Comment


        #18
        Originally posted by jaywish View Post
        I am a fan of that flute pattern.

        I think you need to adjust the right headlight to the right. It should provide much more shoulder coverage.
        Not as sure about the left going more left but you may try that.
        The idea with this flute pattern is to keep the light low into the left into oncoming traffic and that triangle kick up of light goes straight down the road for more distance.
        Have to play with the height after you get the right/left in range as it must be right for it all to come together optimally for you and other traffic, oncoming and in front of you.
        Yeah, after that was taken I widened it out to both sides (the pic angle is weird, both lamps were pointing pretty much directly straight forward) and brought them both up a little. I'm going to make little incremental changes over time until I'm happy with them.

        So far I'm happy with the investment.

        Panthers: 83 GM 2dr | 84 TC | 85 CS | 88 TC | 91 GM
        Not Panthers: 85 Ranger | Ranger trailer | 91 Acclaim | 92 Jaaag | 05 Focus
        Gone: 97 CV | 83 TC | 04 Focus | 86 GM
        | Junkyards

        Comment


          #19
          Sounds great.
          03 Marauder DPB, HS, 6disk, Organizer Mods> LED's in & Out, M&Z rear control arms, Oil deflector, U-Haul Trans Pan, Blue Fuzzy Dice
          02 SL500 Silver Arrow
          08 TC Signature Limited, HID's Mods>06 Mustang Bullet Rims 235/55-17 Z rated BFG G-Force Comp-2 A/S Plus, Addco 1" rear Sway, Posi Carrier, Compustar Remote Start, floor liners, trunk organizer, Two part Sun Visors, B&M Trans drain Plug, Winter=05 Mustang GT rims, Nokian Hakkapeliitta R-2 235/55-17
          12 Escape Limited V6 AWD, 225/65R17 Vredestein Quatrac Pro, Winter 235/70-16 Conti Viking Contact7 Mods>Beamtech LED headlight bulbs, Husky floor liners

          Comment


            #20
            Haha, that headlight aim pic reminds me of the lengths I go to with our cars to get that right. If I drive it all the time, it bugs the shit out of me to not see both beams level with one another. I tend to adjust so the left one goes just a smidge out to the left so it can illuminate the road paint and the right one just a bit more off to the right so I can see the shoulder, but I like both beams to blend evenly into each other too, not just appear like two streaks of separate light... It takes me hours sometimes.
            1985 LTD Crown Victoria - SOLD
            1988 Town Car Signature - Current Party Barge

            Comment


              #21
              Originally posted by DerekTheGreat View Post
              Haha, that headlight aim pic reminds me of the lengths I go to with our cars to get that right. If I drive it all the time, it bugs the shit out of me to not see both beams level with one another. I tend to adjust so the left one goes just a smidge out to the left so it can illuminate the road paint and the right one just a bit more off to the right so I can see the shoulder, but I like both beams to blend evenly into each other too, not just appear like two streaks of separate light... It takes me hours sometimes.
              Thats where aiming my projectors gets tricky. Height is easy, very clean cutoff, set it where its supposed to be. The left/right is much harder to get right, the projectors have a very wide and flat beam pattern, its actually almost easier to set the left/right on them with the high beams because it removes the cut-off shield and gives you a fairly round beam otherwise "centering" them is tricky. It took me a year of tweaking before I got them right in the Town Car, so then I used its lights to make marks on the garage door that I aligned the GMQ's projectors too after I finished them. Worked great except the GMQ sits a bit higher so using the Town Car's reference marks resulted in them being a bit too low, but its close enough I haven't fixed it yet due to laziness. I love the projectors, 1 lamp lights up the road as much as both stock bulbs, but with a better beam pattern and they aren't going to blind anyone.
              -Steve

              2006 Audi A6 S-Line FWD ~132k miles, stock.
              1998 Mercury Grand Marquis LS HPP ~102k miles, slowly acquiring modifications.
              1997 Lincoln Town Car Cartier ~145k miles, Ported Plenum, Gutted Airbox, Mechanical Fan Delete, Contour E-fan Retrofit, Dual exhaust, Cats ran away, KYB Gas-A-Justs, P71 front sway bar, air ride reinstalled, Blinker Mod, Projector headlight retrofit, Caddy 4-note horn retrofit, Wood rim steering wheel, rustbelt diet plan..
              1996 Mercury Grand Marquis GS 117,485mi. R.I.P. 7/14/12

              Comment


                #22
                Ever try that Hoppy thing? I saw one of EricTheCarGuy's videos where he used that. Worked well but needed the nibs on the headlights in order to work.
                1985 LTD Crown Victoria - SOLD
                1988 Town Car Signature - Current Party Barge

                Comment


                  #23
                  Welp, if you wanted to see what a slicktop townie looks like, here ya have it. Rear window does look all funky. https://detroit.craigslist.org/wyn/c...323327251.html
                  1985 LTD Crown Victoria - SOLD
                  1988 Town Car Signature - Current Party Barge

                  Comment


                    #24
                    I don't like the aesthetics of projectors on classic cars, but at the same time I recognize what a massive asshole move and safety issue it is to put HIDs in anything other than them. The projectors look right at home on Steve's car though, having seen it in person.

                    Hoppy is too much $ for me, but that shouldn't be surprising to anyone.

                    Those pics are useful re: slicktop Townie. Attaching for future reference.
                    Attached Files

                    Panthers: 83 GM 2dr | 84 TC | 85 CS | 88 TC | 91 GM
                    Not Panthers: 85 Ranger | Ranger trailer | 91 Acclaim | 92 Jaaag | 05 Focus
                    Gone: 97 CV | 83 TC | 04 Focus | 86 GM
                    | Junkyards

                    Comment


                      #25
                      That's a very well done slick-top too. Having seen a towny with the landau removed... they're ugly as sin under the vinyl.

                      Only two things are infinite, the universe and human stupidity, and I'm not sure about the former. -- Albert Einstein
                      rides: 93 Crown Vic LX (The Red Velvet Cake), 2000 Crown Vic base model (Sandy), 2003 Expedition (the vacation beast)

                      Originally posted by gadget73
                      ... and it should all work like magic and unicorns and stuff.

                      Originally posted by dmccaig
                      Overhead, some poor bastards are flying in airplanes.

                      Comment


                        #26
                        Originally posted by DerekTheGreat View Post
                        Ever try that Hoppy thing? I saw one of EricTheCarGuy's videos where he used that. Worked well but needed the nibs on the headlights in order to work.
                        I've actually have a Hoppy headlight aiming kit. I try and bring it on local meets where I know someone might benefit from getting a decent aiming job. If I ever turn up to a GMN meet, I may bring it for anyone that wants adjustments. It just sucks when the aimers themselves seize or the nylon bushing it threads into strips out. Most common thing I see is over time the vertical adjustment gets out, usually aimed at the ground. From time to time, you'll find some badly cross-eyed cars, though.


                        My Cars:
                        -1964 Comet 202 (116K Miles) - Long Term Project
                        -1979 Ford LTD Landau (38K Miles) - New Cruiser

                        -1986 Dodge D-150 Royale SE (112K Miles) - Slowly Getting Put Back Together
                        -1987 Grand Marquis Colony Park LS (343K Miles) - April 2017 + September 2019 POTM Winner
                        -1997 Grand Marquis LS (244K Miles) - March 2015 + January 2019 POTM Winner - Sold (05/2011 - 07/2024)

                        Comment


                          #27
                          Originally posted by Kodachrome Wolf View Post
                          I've actually have a Hoppy headlight aiming kit. I try and bring it on local meets where I know someone might benefit from getting a decent aiming job. If I ever turn up to a GMN meet, I may bring it for anyone that wants adjustments. It just sucks when the aimers themselves seize or the nylon bushing it threads into strips out. Most common thing I see is over time the vertical adjustment gets out, usually aimed at the ground. From time to time, you'll find some badly cross-eyed cars, though.
                          I remember you posting about using that thing. That's where I learned what those 3 little nipple things on the headlight are for. I actually mentioned that post at our Detroit meet this Summer for some reason. I think it was while riding in Kevin's '84 TC.
                          Vic

                          ~ 1989 MGM LS Colony Park - Large Marge
                          ~ 1998 MGM LS - new DD
                          ~ 1991 MGM LS "The Scab"
                          ~ 1991 MGM GS "The Ice Car"

                          Comment


                            #28
                            Originally posted by DerekTheGreat View Post
                            Ever try that Hoppy thing? I saw one of EricTheCarGuy's videos where he used that. Worked well but needed the nibs on the headlights in order to work.
                            I own one, haven't used it yet. Mine is missing one piece that is needed to get the initial level for the floor. I haven't spent the time to use a straightedge and a rule to work out the correction angles. Only works on proper DOT lights though.
                            86 Lincoln Town Car (Galactica).
                            5.0 HO, CompCams XE258,Scorpion 1.72 roller rockers, 3.55 K code rear, tow package, BHPerformance ported E7 heads, Tmoss Explorer intake, 65mm throttle body, Hedman 1 5/8" headers, 2.5" dual exhaust, ASP underdrive pulley

                            91 Lincoln Mark VII LSC grandpa spec white and cranberry

                            1984 Lincoln Continental TurboDiesel - rolls coal

                            Originally posted by phayzer5
                            I drive a Lincoln. I can't be bothered to shift like the peasants and rabble rousers

                            Comment


                              #29
                              Originally posted by VicCrownVic View Post
                              I remember you posting about using that thing. That's where I learned what those 3 little nipple things on the headlight are for. I actually mentioned that post at our Detroit meet this Summer for some reason. I think it was while riding in Kevin's '84 TC.
                              That may have been the case, I remember Hoppys...Hoppies? coming up sometime not too long ago. I knew about it before but could just never really justify it especially given that I have 3 different types of sealed beams in use and knew I'd likely go conversion housings eventually.

                              The conversion housings do not have them, and I imagine the optics are different enough that marking the desired light pattern on a wall and aiming to match is probably the best choice.

                              Panthers: 83 GM 2dr | 84 TC | 85 CS | 88 TC | 91 GM
                              Not Panthers: 85 Ranger | Ranger trailer | 91 Acclaim | 92 Jaaag | 05 Focus
                              Gone: 97 CV | 83 TC | 04 Focus | 86 GM
                              | Junkyards

                              Comment


                                #30
                                Originally posted by sly View Post
                                That's a very well done slick-top too. Having seen a towny with the landau removed... they're ugly as sin under the vinyl.
                                I'm trying to figure out what the badge is on the C pillar. Can't tell if its factory or not, most likely not. It is well done but shame there's nothing that can be done about the rear window, would need something to cover it externally or new internal trim not to mention another window with a larger defrost grid.

                                As for the headlight stuff, I don't think a hoppy thing would be enough for me. I spend hours over multiple days to get that crap right. I love the job I did with my Town Car but the high beams aim too high, need recalibration but hasn't happened since it's no longer a daily.
                                1985 LTD Crown Victoria - SOLD
                                1988 Town Car Signature - Current Party Barge

                                Comment

                                Working...
                                X