Announcement

Collapse
No announcement yet.

AIR DEFLECTOR install for Boxes

Collapse
X
 
  • Filter
  • Time
  • Show
Clear All
new posts

    AIR DEFLECTOR install for Boxes

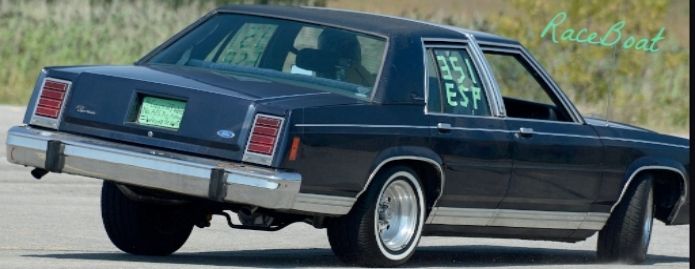
    Thought I would begin this thread.
    First part needed is a Box Panther body
    Second is the Air Deflector I used PN 39-7400 from LMC truck.
    Used the same one from another vendor the first go around but it was warped a bit it just came in a bag LMCs came bagged but in a box. Price around 30.00
    They have other versions with tow hook openings aand another with fog light openings. Think any of them would work. There are chromed ones also but guessing bending them a bit to fit the bumpper would screw up the chrome.
    Scars are tatoos of the fearless

    #2
    I found the catalog page, for others interested:

    Shop from thousands of parts and accessories to help you restore, maintain, and customize your Chevrolet, GMC, Dodge or Ford truck or SUV. Keep 'em on the road with the right part, right price, right now.


    I've been looking for something to replace the practically useless plastic deflector/front spoiler thing boxes come with, so I'm curious how this turns out.
    Last edited by ootdega; 02-22-2015, 08:55 AM.
    89 Grand Marquis GS.

    Putting it here because I keep forgetting to mention it. It's not very exciting at the moment.

    Comment


      #3
      Cheap! And wouldn't look bad if it's matches up. If you or anyone else decides to get that, keep us posted!
      -Phil

      sigpic

      +1982 Ford LTD-S Police Car. Built 351w, Trickflow 11R 190 Heads, Holley Sniper EFI, RPM Intake+ Hyperspark dizzy, WR-AOD, Full exhaust headers to tails. 3.27 Trac-Lok Rear. Aluminum Police Driveshaft. Speedway Springs+Bilstein Shocks, Intermediate Brakes, HPP Steering Box.

      +2003 Acura CL Type S 6-speed

      Comment


        #4
        He's done it and posted a couple pics in a couple of threads. Sounds like Dave will compile the pics and work needed to install it in this thread here. It involved disassembling the bumper and welding additional pieces on the underside to provide mounting points.
        ~David~

        My 1987 Crown Victoria Coupe: The Brown Blob
        My 2004 Mercedes Benz E320:The Benz

        Originally posted by ootdega
        My life is a long series of "nevermind" and "I guess not."

        Originally posted by DerekTheGreat
        But, that's just coming from me, this site's biggest pessimist. Best of luck

        Originally posted by gadget73
        my car starts and it has AC. Yours doesn't start and it has no AC. Seems obvious to me.


        Comment


          #5
          Yes, the bumper must be removed and dissasembled.
          There are 2 styles of attaching the bumper some are bolted on and some are studs. The stud style can be a pain to remove do to rusting. A fix for this is spray some form of liquid wrench on the threads. T hat dosent always work out all that well so its best to purchase a 10mm x 1.5 die hex style so a wrench can be used on it as a typ die holder wont clear. Run the die down normaly as if cutting a thread back the die off then run it down again backward facing if you will so threads are perty much cleaned up to the top of the nut.
          Failer to do this could mean busting a stud, breaking the stud loose from its "L" bracket or both. The bracket is not easy to find, access or repair.
          Once th bumper is removed it has to be completely dissasembled for fitting of the deflector.

          Finished it will look like this. I cut a slot in my bumper to let more air into the rad. Its not realy necessary except maaybe a realy juced up engine but i ran without the cut out with no problems
          Attached Files
          Last edited by turbo2256b; 02-23-2015, 04:34 PM.
          Scars are tatoos of the fearless

          Comment


            #6
            That sounds a lot more complicated than it should be.

            Why must it be entirely disassembled?
            89 Grand Marquis GS.

            Putting it here because I keep forgetting to mention it. It's not very exciting at the moment.

            Comment


              #7
              So you know, that air deflector only fits good on 79-87's. It doesn't come close to fitting on the 88-91's.
              2020 F250 - 7.3 4x4 CCSB STX 3.55's - BAKFlip MX4
              2005 Grand Marquis GS - Marauder sway bars, Marauder exhaust, KYB's
              2003 Marauder - Trilogy # 8, JLT, kooks, 2.5" exhaust, 4.10's/31 spline, widened rear's, metco's, addco's, ridetech's 415hp/381tq
              1987 Colony Park - 03+ frame swap, blown Gen II Coyote, 6R80, ridetechs, stainless works, absolute money pit. WIP

              Comment


                #8
                I gotta admit I also don't get why it can't just have the bolts that are at the underside of the bumper run through it. Looks neat, but why take the bumper apart?

                85 4 door 351 Civi Crown Victoria - Summer daily driver, sleeper in the making, and wildly inappropriate autocross machine
                160KMs 600cfm holley, shorty headers, 2.5" catted exhaust, 255/295 tires, cop shocks, cop swaybars, underdrive pulley, 2.73L gears.
                waiting for install: 3.27's, Poly bushings, boxed rear arms, 2500 stall converter, ported e7's, etc

                06 Mazda 3 hatch 2.3L 5AT (winter beater that cost more than my summer car)

                Comment


                  #9
                  Some factory bolts are used and some are not some are added.
                  Scars are tatoos of the fearless

                  Comment


                    #10
                    Originally posted by pantera77 View Post
                    So you know, that air deflector only fits good on 79-87's. It doesn't come close to fitting on the 88-91's.
                    Ah. Could still learn a few things from it and get some ideas.
                    89 Grand Marquis GS.

                    Putting it here because I keep forgetting to mention it. It's not very exciting at the moment.

                    Comment


                      #11
                      After disasembly of the inner and outer bumper. The rubber strips dont have to be removed but the nerf bumperetts do. Insert 7/16 bolts in the lower holes the bumperetts attach to. Best to do the nut side up as shown. Also needed are some small "C" clamps or something similar to hold the deflector in place while making adjustments.


                      Click image for larger version

Name:	Hacker pipes 001.jpg
Views:	1
Size:	77.2 KB
ID:	1277075
                      The inbord oval holes in the deflector are set up as shown on each side. Basicly center the defelector in these holes left and right fore and aft baset on the nuts of the 7/16 bolts. This dosent finish the alignment process but at this point a couple C clamps 3 or 4 should be used inbetween the bolts to hold the defelector in place

                      Click image for larger version

Name:	Hacker pipes 002.jpg
Views:	1
Size:	69.2 KB
ID:	1277076Click image for larger version

Name:	Hacker pipes 003.jpg
Views:	1
Size:	46.9 KB
ID:	1277077

                      These holes in the deflector will have nothing to do with holding the deflector to the bumper in the end. The simimlar outer most holes in the deflector wont either but they will be discused later on.

                      Click image for larger version

Name:	Hacker pipes 004.jpg
Views:	1
Size:	79.7 KB
ID:	1277078
                      Last edited by turbo2256b; 02-26-2015, 07:53 PM.
                      Scars are tatoos of the fearless

                      Comment


                        #12
                        Click image for larger version

Name:	Hacker pipes 009.jpg
Views:	1
Size:	109.7 KB
ID:	1277079
                        NOTE THE INCERCLED AREAS on the inside edges of the bumper and deflector END up closest in these areas.

                        Click image for larger version

Name:	Hacker pipes 008.jpg
Views:	2
Size:	88.8 KB
ID:	1277080
                        From above it shuld look like this. Close to perfect between the nerf bumperetts.
                        Scars are tatoos of the fearless

                        Comment


                          #13
                          Next the the deflector needs to move forward to keep allignment to the bumper. To do this the center holes need to have 1/4 probably closer to 3/8 of an inch cut out to allow the deflector to bend.

                          Click image for larger version

Name:	Hacker pipes 002.jpg
Views:	1
Size:	70.7 KB
ID:	1277082 Cut between the arrows


                          Click image for larger version

Name:	FIAT R BRAKES 004.JPG
Views:	1
Size:	102.4 KB
ID:	1277083 Should end up looking like this. Dosent matter if the cuts a bit wide. Infact best if they dont quite touch after bending to allign with the ends of the bumper. A little extra trim might be needed
                          Scars are tatoos of the fearless

                          Comment


                            #14
                            Click image for larger version

Name:	Hacker pipes 008.jpg
Views:	2
Size:	88.8 KB
ID:	1277084

                            The pencel line on the bumper is about were the front edge of the deflector will bend to after allignig it to the ends of the bumper.

                            Going to need a few more clamps to hold everthing in place next.
                            Scars are tatoos of the fearless

                            Comment


                              #15
                              You mention
                              Insert 7/16 bolts in the lower holes the bumperetts attach to
                              Is there any reason besides just filling up the hole?
                              ~David~

                              My 1987 Crown Victoria Coupe: The Brown Blob
                              My 2004 Mercedes Benz E320:The Benz

                              Originally posted by ootdega
                              My life is a long series of "nevermind" and "I guess not."

                              Originally posted by DerekTheGreat
                              But, that's just coming from me, this site's biggest pessimist. Best of luck

                              Originally posted by gadget73
                              my car starts and it has AC. Yours doesn't start and it has no AC. Seems obvious to me.


                              Comment

                              Working...
                              X