Announcement

Collapse
No announcement yet.

Surely this has been discussed before? Foggy Headlight Restoration

Collapse
X
 
  • Filter
  • Time
  • Show
Clear All
new posts

    Surely this has been discussed before? Foggy Headlight Restoration

    My apologies of there is already a thread on the topic. I did a search and found nothing.

    I noticed a minor amount of fogginess in the Marq and there is def some on my stang. In which the suggestions were either to wet sand or buy a kit like from 3M or Meguiars. Ok, simple enough I guess.

    But when I look at these lights when they are running, it looks as if there is a haze/fog on the INSIDE of the headlight assembly. Nothing really BAD but I am funny about my vison at night so I want to do what I can to fix the problem before they have to be completely replaced.

    So my questions are:

    1. What does everyone use for the exterior lens cleaning/scratch removal/polishing? Please name success' and failure's with specific product.

    2. Has anyone addressed the inner fog/haze issue? If so, what actions did you take to fix and did it work?
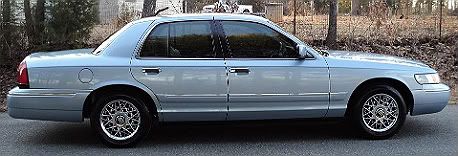
    '01 Mercury Grand Marquis GS 4.6L
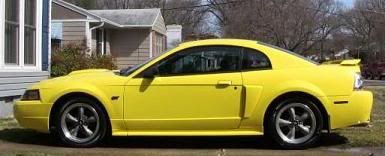
    '01 Ford Mustang GT 4.6L

    #2
    I just bought new headlamp housings from rock auto. it was only $5 more per housing than the polishing kit. This was on a 93 though. the newer style assemblies may be more.

    Only two things are infinite, the universe and human stupidity, and I'm not sure about the former. -- Albert Einstein
    rides: 93 Crown Vic LX (The Red Velvet Cake), 2000 Crown Vic base model (Sandy), 2003 Expedition (the vacation beast)

    Originally posted by gadget73
    ... and it should all work like magic and unicorns and stuff.

    Originally posted by dmccaig
    Overhead, some poor bastards are flying in airplanes.

    Comment


      #3
      I've had good luck with the $10 Turtle Wax lens clear polish w/e kit.

      Buddy @ work did his Grand AM after my recommendation. Only caveat would be take apart the headlight housing/lens. Then run through the rub/polish 3X or until your arms wear out, and you shall be happy.
      ,
      Slicktop '91 GS HO 4.30 rear. '82 Mark VI Tudor HO, '90 F-150 XLT, '62 project Heep, '89 Arizona Waggin' and '88 donor in PA, getting combined.

      Comment


        #4
        I used a kit on my Stepdad's 03 Camry. It came up pretty good, but after about a year they are hazing over again.
        2020 Volvo XC90 T6 Momentum (Ice White / Blonde)
        2022 Ram 1500 4x4 5.7 Etorque, Built to Serve Edition, (Granite Crystal / Black)
        Past Panthers
        1989 Grand Marquis LS (Cabernet/Grey), 1989 Lincoln Town Car SS (White/Blue), 2004 Mercury Grand Marquis Ultimate (White/Black)

        Originally posted by Lincolnmania
        if its got tits or tires it's bound to give you trouble

        Comment


          #5
          wet sand with 1200 grit, then 1500 grit, then polish them with plasti x plastic polish

          1986 lincoln towncar signature series. 5.0 HO with thumper performance ported e7 heads, 1.7 roller rockers, warm air intake, 65mm throttle body, 1/2" intake spacer, ported intakes, 3.73 rear with trac lock, 98-02 front brake conversion, 92-97 rear disc conversion, 1" rear swaybar, 1 3/16" front swaybar, 16" wheels and tires, loud ass stereo system, badass cb, best time to date 15.94 at 87 mph. lots of mods in the works 221.8 rwhp 278 rwt
          2006 Lincoln Town Car Signature. Stock for now
          1989 Ford F-250 4x4 much much more to come, sefi converted so far.
          1986 Toyota pickup with LSC wheels and 225/60/16 tires.
          2008 Hyundai Elantra future Revcon toad
          1987 TriBurner and 1986 Alaska stokers keeping me warm. (and some pesky oil heat)

          please be patient, rebuilding an empire!

          Comment


            #6
            The reason they re-haze is after polishing you need some UV protectant clearcoat.

            If they are bad enough to be hazed on both sides, just buy new lenses. Taking the lenses off to polish the inside can ruin the lights.
            Builder/Owner of Badass Panther Wagons

            Busy maintaining a fleet of Fords

            Comment


              #7
              Originally posted by mrltd View Post
              The reason they re-haze is after polishing you need some UV protectant clearcoat.

              If they are bad enough to be hazed on both sides, just buy new lenses. Taking the lenses off to polish the inside can ruin the lights.
              Never even thought about clearing them. Next time I do them for him, I will certainly give that a try.
              2020 Volvo XC90 T6 Momentum (Ice White / Blonde)
              2022 Ram 1500 4x4 5.7 Etorque, Built to Serve Edition, (Granite Crystal / Black)
              Past Panthers
              1989 Grand Marquis LS (Cabernet/Grey), 1989 Lincoln Town Car SS (White/Blue), 2004 Mercury Grand Marquis Ultimate (White/Black)

              Originally posted by Lincolnmania
              if its got tits or tires it's bound to give you trouble

              Comment


                #8
                The assemblies for my 97 GM were hazed badly inside and out ( I could drive with my brights on no problem), but new ones were a bit pricey - $85 ea cheapest off ebay iirc. It did include new bulbs too though.

                Pete
                Originally posted by gadget73
                For other types of inquiry, more information is required. Please press 4 to speak to a representative who can help you with your question. This call may be monitored for quality assurance purposes.


                2003 Grand Marquis Ultimate, the "Stealth Bomber": http://www.grandmarq.net/vb/showthre...-Grand-Marquis
                1991 S-10, 'Bulldog', 2.5l 5 speed: http://www.grandmarq.net/vb/showthre...375#post698375
                1985 Town Car, 'Faded Glory', gone but not forgotten. 84/87/91/97 MGMs too.

                Comment


                  #9
                  I already did mine or I would do a complete write up and maybe video. If anyone would like there's done I will do them for the sake of the write up but you will have to pay shipping. Anyway, My best advice would be to remove the headlight assembly so you can work with it on the bench. Second remove the nubs (the little nipple things they are useless and will ease cleaning and polishing but this step is really up to you). I taped all around the nubs and some of the lens to protect it from the file and just filed the nubs down smooth to the lens.

                  You can start with 1,000 grit wet sand paper and keep it good and wet, then use 1,500 grit and then 2,000. there is going to be some kind of clear coat that is already on the lens and you need to get that all off and I suggest you get it off with the 1,000 grit and then start working your way to the 2,000.

                  Then I used a metal buffer (I know it sounds stupid but it worked like a charm). This consisted of a wheel attached to my bench grinder and I couldn't even tell you what kind of rouge I have because I found the set up at a garage sale but I would guess it is a medium. I use the same set up to buff my guitar frets.

                  After you machine buff it use come hand glaze or something or even the platix stuff mentioned above. The clear coat is up to you but it you are going to clear it you may want to leave it in sanded condition after the 2,000 but I never cleared mine so I can't speculate really. Mine have been going strong for about two years now and I have no sign of hazing yet. I do occasionally hand buff them with imperial hand glaze and sometimes I rainex them but that's it.

                  As for the inside I have heard of methods of using rubbing alcohol swished around inside but again I have not done that yet either though I may because one headlight is a little foggy inside due to moisture build up in the past. Also if you get some moisture in your headlight I have dealt with it two different ways. First of all either way remove the housing and dump all the water out you can. Second you can remove the bulb/bulbs and get your shop vac hose one it and let the shop vac pull the moisture out. Or you can remove the bulb retainer and let the bulb sit loose but make sure it isn't touching anything that can melt and leave your brights on for a while and let it evaporate and while it is still warm secure the bulb again. I know it is a bit far fetched but my theory was that if you heated the inside of the housing and all the air with the light bulb and then secured it when it cooled down it would be under a slight vacuum if it is sealed good but that could just be my crazy theory. Either way I haven't had any problems so I must be doing something right lol.

                  Here are some pics right after it was done but it still looks the same.


                  Last edited by Guest; 10-08-2010, 06:25 PM. Reason: Added pics

                  Comment


                    #10
                    The nubs on the headlights do serve a purpose. The are for the headlight alignment tool, that really nobody would ever use again. lol
                    ~David~

                    My 1987 Crown Victoria Coupe: The Brown Blob
                    My 2004 Mercedes Benz E320:The Benz

                    Originally posted by ootdega
                    My life is a long series of "nevermind" and "I guess not."

                    Originally posted by DerekTheGreat
                    But, that's just coming from me, this site's biggest pessimist. Best of luck

                    Originally posted by gadget73
                    my car starts and it has AC. Yours doesn't start and it has no AC. Seems obvious to me.


                    Comment


                      #11
                      I knew they served a purpose but who is ever going to take their car to the dealer to have their headlights aligned? lol I would imagine that if you are going to defog them you probably would align them yourself.

                      To me, they are pointless.

                      Comment


                        #12
                        A lot of headlights dont even have the tits for that style of alignment tool anymore. They've gotten back to the old school "chart on the wall" kind of thing instead of the suction cup on the front of the light using the tits to aim it dealie. I've used the suction cup thing once in auto shop, but I don't know a single person who owns one. Most people I know use brick walls and a parking lot.
                        86 Lincoln Town Car (Galactica).
                        5.0 HO, CompCams XE258,Scorpion 1.72 roller rockers, 3.55 K code rear, tow package, BHPerformance ported E7 heads, Tmoss Explorer intake, 65mm throttle body, Hedman 1 5/8" headers, 2.5" dual exhaust, ASP underdrive pulley

                        91 Lincoln Mark VII LSC grandpa spec white and cranberry

                        1984 Lincoln Continental TurboDiesel - rolls coal

                        Originally posted by phayzer5
                        I drive a Lincoln. I can't be bothered to shift like the peasants and rabble rousers

                        Comment


                          #13
                          last time I had lights aligned, it was after a smash up and the shop used one of those "charts in a box" things that's on an adjustable stand. Level it with the headlight and adjust the beam until it hits the cross hair.

                          Only two things are infinite, the universe and human stupidity, and I'm not sure about the former. -- Albert Einstein
                          rides: 93 Crown Vic LX (The Red Velvet Cake), 2000 Crown Vic base model (Sandy), 2003 Expedition (the vacation beast)

                          Originally posted by gadget73
                          ... and it should all work like magic and unicorns and stuff.

                          Originally posted by dmccaig
                          Overhead, some poor bastards are flying in airplanes.

                          Comment

                          Working...
                          X