Well this is gonna be a write-up on how to relocate the battery. I'm going to have to point out right now that some things under the hood are different because my battery was already moved to the driver side previously
NOTE:
I don't have pics of the new engine to frame ground wire. This needs to be done with this upgrade!! Use a 2 gauge wire to run from the engine to the frame. (exhaust manifold bolt/studs work well)
Also any other ground or power lines that were directly connected to the battery or battery cables need to be appropriately relocated.
Battery Relocations
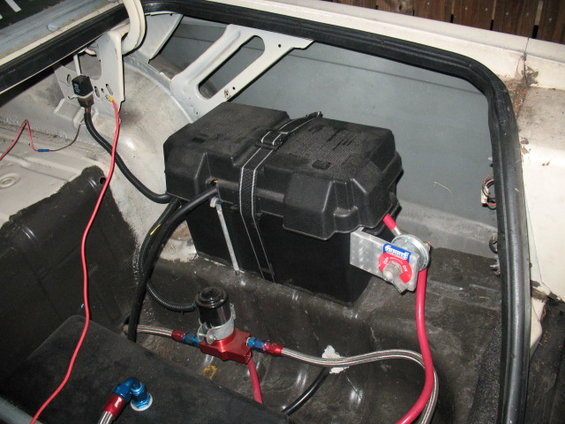
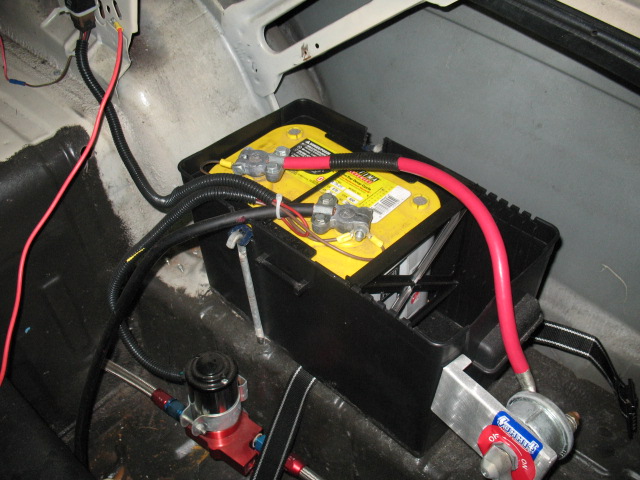
Battery Box
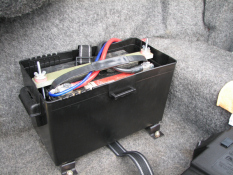
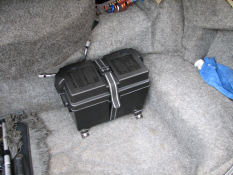
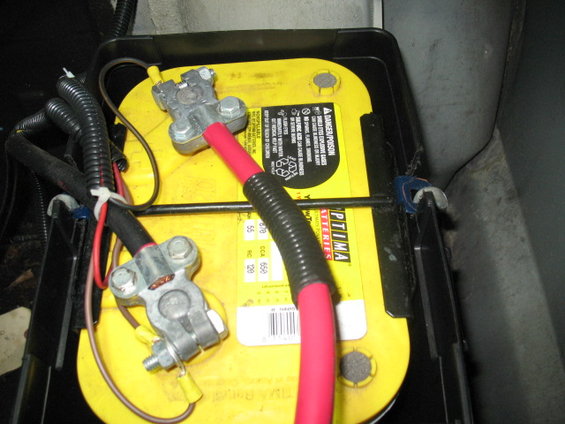
Not a necessary step but something I wanted to do was to make a mounting bracket for the battery box. Reason for this is that the directions state that you should drill a whole in the trunk pan and use silicone to seal up around the 'J' bolts. I'm not a fan of that idea and would rather have a water tight seal without silicone goop. So the brackets I build level off the battery as well as provide a place to run the 'J' bolts through.
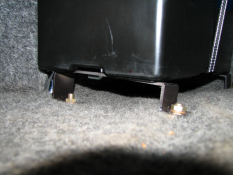
I used a piece of non-conductive composite material as the hold down bracket for the battery. Running the 'J' bolts through the bracket and bolting it down securely.
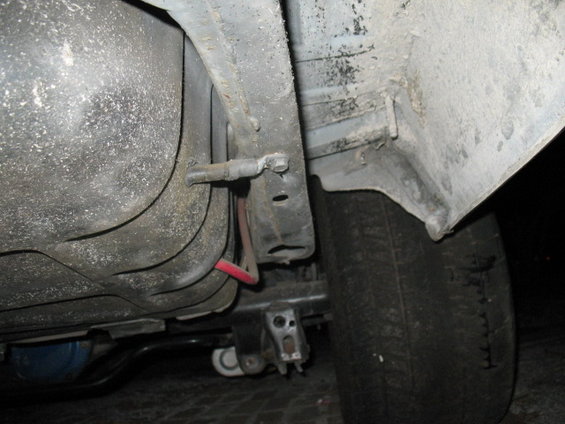
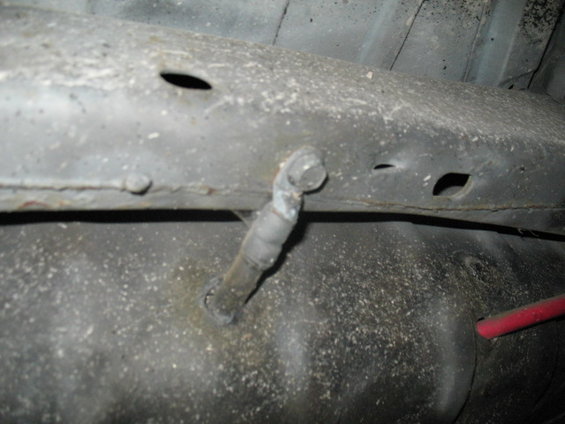
Ground Wire
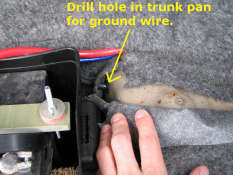
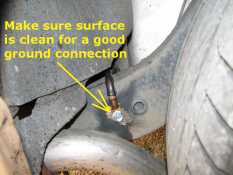
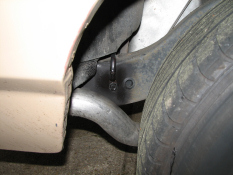
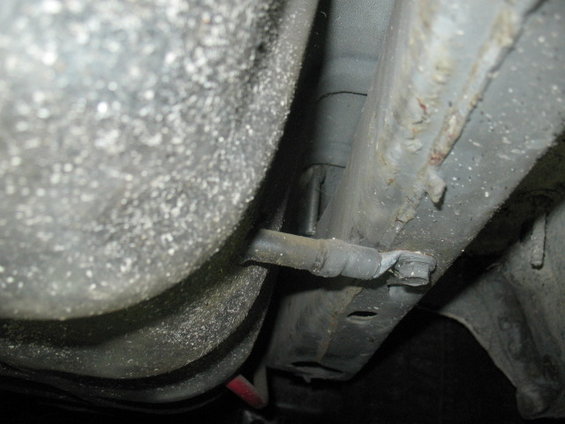
Next I drilled a whole in the trunk pan to the side, about one inch down from the top edge of the side humps. This is for the ground wire to go to the frame. Makes sure the hole is far enough up to clear the frame. Use a rubber grommet to seal the wire in the hole. Use soap on the wire to help it go through the grommet without any issues. Once you have a hole drilled in the frame, make sure the area around is bare of any paint or corrosion so that you get good connectivity. I suggest that you paint over everything once you are done to prevent rust.
Positive Wire
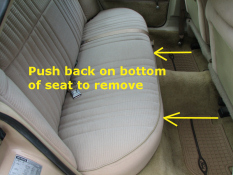
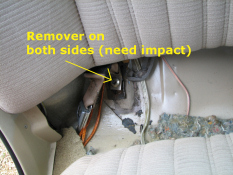
First thing you should do is remove the back seat. Push in at the bottom of the lower cushion to remove. You can do one side at a time. No tools are needed for that part. For the back of the seat you will need a T-50 torx bit and a good impact wrench. Doing it with a breaker bar is very easy to brake the bit from side loading it. These bolts are generally difficult to remove.
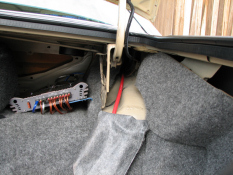
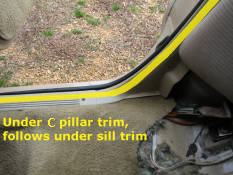
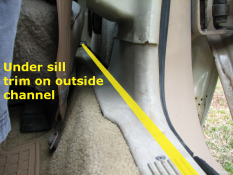
Starting from the battery box, run the positive wire, (which should be either 2 or 1 gauge). Start by running it under the carpets like int he picture. Run it over the wheel well hump and through the back seat area. Then tuck it under the C pillar trim and follow through to the door sill trim. The door sill trim, and front passenger kick panel need to be removed. Run the wire on the outside edge. The reenforcement for the door sill trim will hold it off to the side.
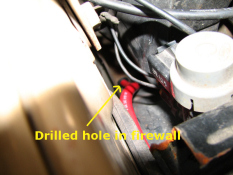
Once you get the wire run to the front, you will need to drill another hole in the firewall. Drill the hole as far to the outside of the car as possible, don't have to bend anything, but but the drill up against the body where the kick panel was. Try to get it as high as well, again no need to strain it. Again use a rubber grommet to seal it. Using soap on this is a MUST! You will feed the wire upwards at an angle. Try and aim it towards the passenger side hood hinge. Once you can grab it from the front side you can pull it through, but if your cable doesn't have soap on it then the grommet will get pulled through and you have to start over. After that well it's pretty self explanatory. Run it to the ignition module and finish up.


AGAIN NOTE:
I don't have pics of the new engine to frame ground wire. This needs to be done with this upgrade!! Use a 2 gauge wire to run from the engine to the frame. (exhaust manifold bolt/studs work well)
Also any other ground or power lines that were directly connected to the battery or battery cables need to be appropriately relocated.
NOTE:
I don't have pics of the new engine to frame ground wire. This needs to be done with this upgrade!! Use a 2 gauge wire to run from the engine to the frame. (exhaust manifold bolt/studs work well)
Also any other ground or power lines that were directly connected to the battery or battery cables need to be appropriately relocated.
Battery Relocations
Battery Box
Not a necessary step but something I wanted to do was to make a mounting bracket for the battery box. Reason for this is that the directions state that you should drill a whole in the trunk pan and use silicone to seal up around the 'J' bolts. I'm not a fan of that idea and would rather have a water tight seal without silicone goop. So the brackets I build level off the battery as well as provide a place to run the 'J' bolts through.

I used a piece of non-conductive composite material as the hold down bracket for the battery. Running the 'J' bolts through the bracket and bolting it down securely.


Ground Wire
Next I drilled a whole in the trunk pan to the side, about one inch down from the top edge of the side humps. This is for the ground wire to go to the frame. Makes sure the hole is far enough up to clear the frame. Use a rubber grommet to seal the wire in the hole. Use soap on the wire to help it go through the grommet without any issues. Once you have a hole drilled in the frame, make sure the area around is bare of any paint or corrosion so that you get good connectivity. I suggest that you paint over everything once you are done to prevent rust.


Positive Wire
First thing you should do is remove the back seat. Push in at the bottom of the lower cushion to remove. You can do one side at a time. No tools are needed for that part. For the back of the seat you will need a T-50 torx bit and a good impact wrench. Doing it with a breaker bar is very easy to brake the bit from side loading it. These bolts are generally difficult to remove.


Starting from the battery box, run the positive wire, (which should be either 2 or 1 gauge). Start by running it under the carpets like int he picture. Run it over the wheel well hump and through the back seat area. Then tuck it under the C pillar trim and follow through to the door sill trim. The door sill trim, and front passenger kick panel need to be removed. Run the wire on the outside edge. The reenforcement for the door sill trim will hold it off to the side.


Once you get the wire run to the front, you will need to drill another hole in the firewall. Drill the hole as far to the outside of the car as possible, don't have to bend anything, but but the drill up against the body where the kick panel was. Try to get it as high as well, again no need to strain it. Again use a rubber grommet to seal it. Using soap on this is a MUST! You will feed the wire upwards at an angle. Try and aim it towards the passenger side hood hinge. Once you can grab it from the front side you can pull it through, but if your cable doesn't have soap on it then the grommet will get pulled through and you have to start over. After that well it's pretty self explanatory. Run it to the ignition module and finish up.


AGAIN NOTE:
I don't have pics of the new engine to frame ground wire. This needs to be done with this upgrade!! Use a 2 gauge wire to run from the engine to the frame. (exhaust manifold bolt/studs work well)
Also any other ground or power lines that were directly connected to the battery or battery cables need to be appropriately relocated.



Comment