First, check out this thread for the wiring diagrams.
Also, check out the swap page: http://www.grandmarq.net/85crownLX/p...lternator.html
very good pics in this thread
You will need a 3G alternator from one of the following vehicles:
93-99 narrow-eared non-DOHC Taurus 3.0L V6 (Vulcan)
94-95 V8 Mustang
94-00 V6 Mustang
94-97 V6 T-Bird/Cougar
95-98 Windstar (3.0L V6 Vulcan)
91-94 V6 Lincoln Continental.
The lower bolt hole on the alternator may need to be drilled out to accept the bolt from your panther, and unless you tap the top hole, you will need to use a bolt/nut arrangement for the top hole.
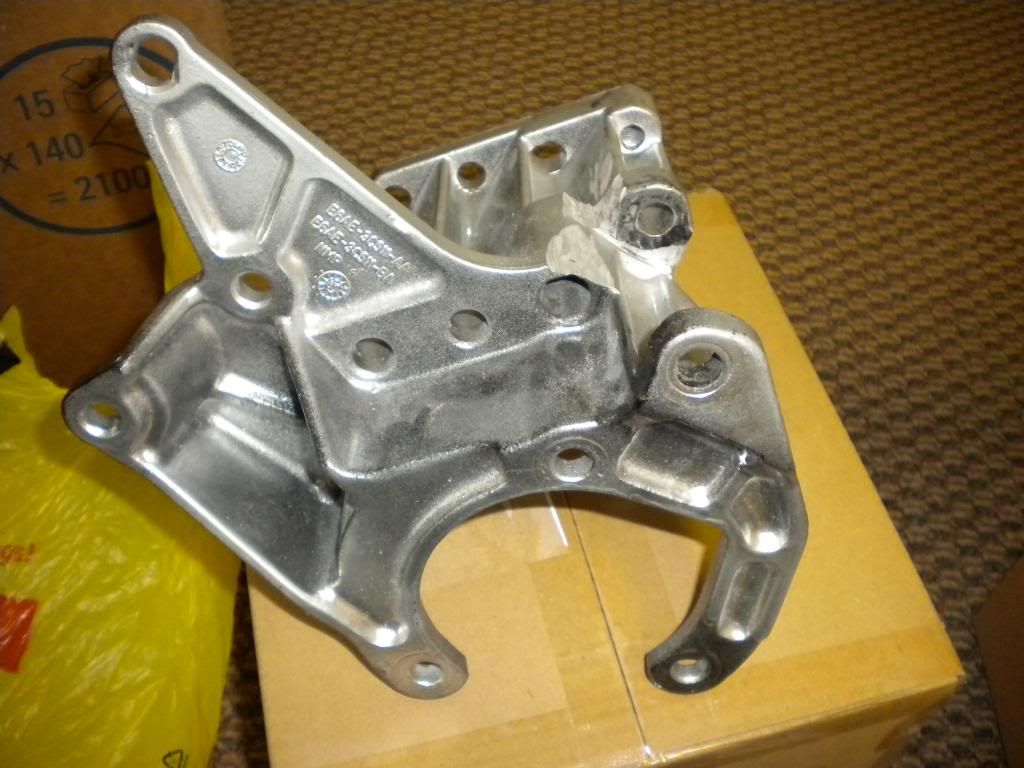
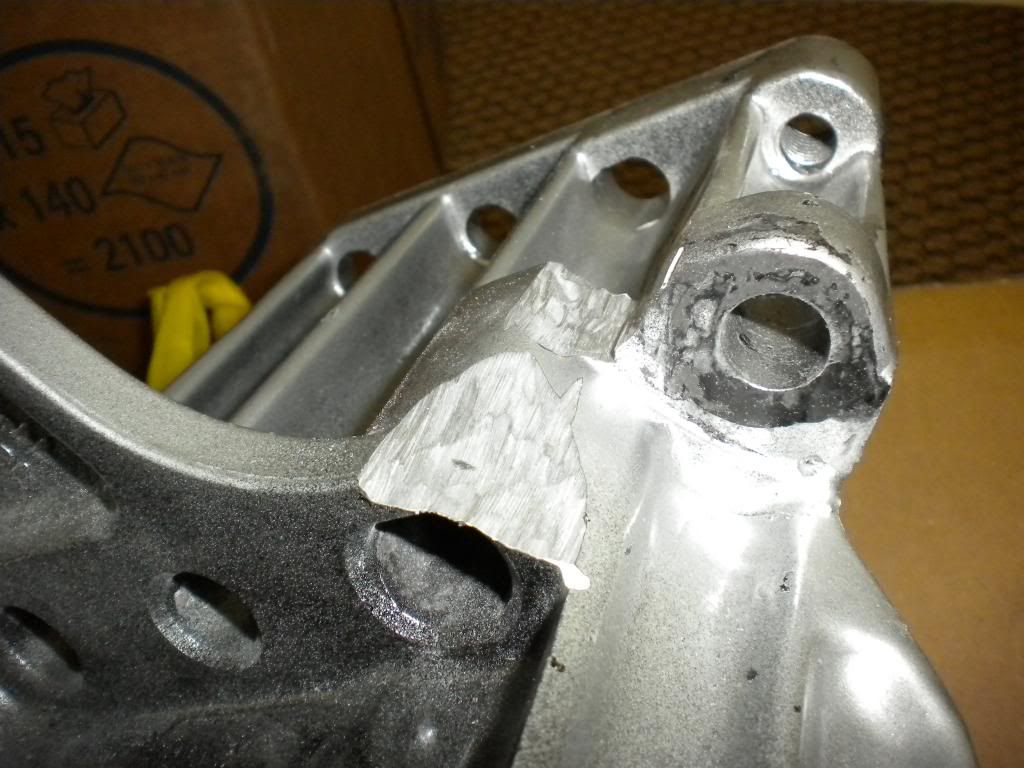
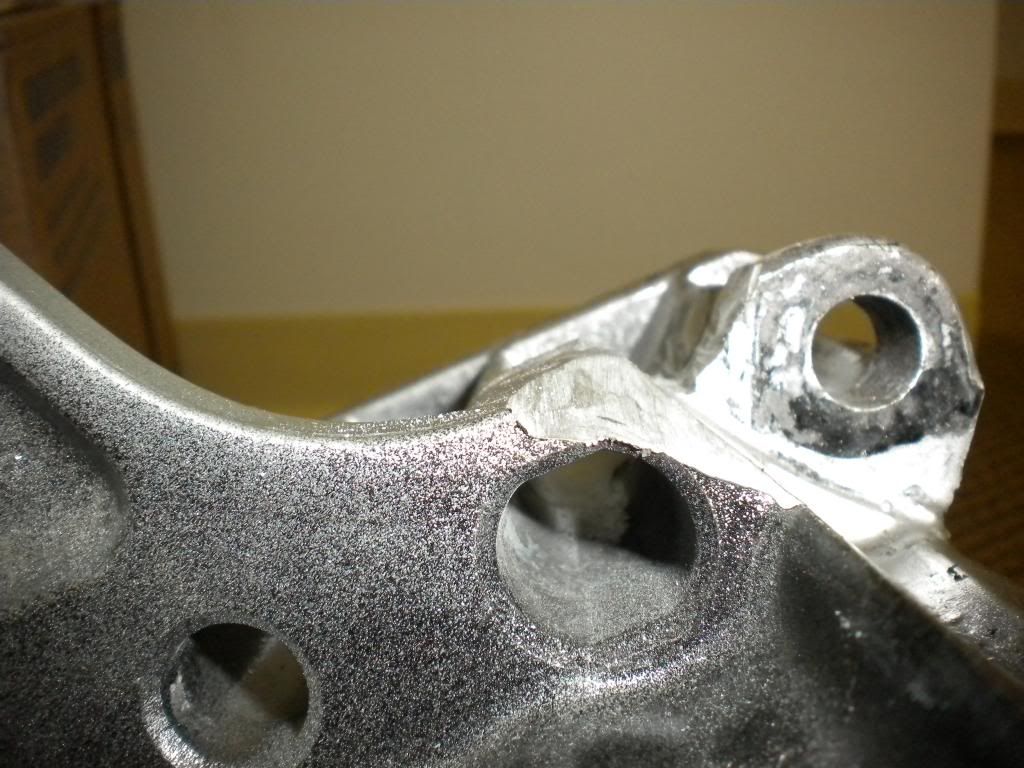
You may also need to grind the mounting bracket that the lower bolt mounts in to allow greater movement for putting the belt on. This means the crank side of the valley between the tabs that the bolt threads through and clearance the head side tab towards the water pump so the case bolt lump will have more room to move. (post #13 for pics)
Don't feel like alternator hunting in junk yards, then get an all-in-one kit with the alternator and all the small parts needed:
Best bet for handy parts kits is Late Model Restoration's alternator stuff. A couple of other small items are available elsewhere. These are the best deals I've found as of this post.
- small parts kit (if you want to do most of the wiring yourself and know what you're doing - 2G regulator connector will plug into the 3G - but needs modified): http://www.latemodelrestoration.com/...mall-Parts-Kit
- Just the stator plug if you have your own shrink wrap and solder/crimps: https://lmr.com/item/LRS-14290C/94-0...ng-Stator-Plug
- conversion kit (less wiring to do): http://www.latemodelrestoration.com/...onversion-Wire
- 10 foot Charge cable (this can be routed the same way the stock charge cables are - megafuse should be closer to the the battery): https://lmr.com/item/SVE-9902A/Musta...-Suppression-3
- cable boot (cover the nut on the alternator): http://www.delcity.net/store/3:8!in-...ulators/p_1033
- OPTIONAL - Battery post extension: http://store.alternatorparts.com/f1-452-038.aspx (typically less on eBay)
- OPTIONAL (not needed - but may improve longevity on high rev applications) - 6G clutch pulley http://www.nationsstarteralternator....-p/24-2279.htm or http://store.alternatorparts.com/partno242279.aspx
-- Clutch pulley tool (needed to install/remove clutch pulley): http://store.alternatorparts.com/126...nd-r-tool.aspx
Once the alternator is prepped for fitment (bottom bolt hole drilled out if needed, bracket ground down on the crank side to allow greater motion of the new alternator), dry fit the alternator to make sure you're done with that part.
The wiring will depend on if you're upgrading from a 1G or a 2G. There are adapters to make a 1G swap easy, but you can also just splice the wires yourself. Check the wiring diagrams in the first link at the top of this post. If using the swap connector (required for the upgrade from 1G), the wire colors are the same and you just splice the matching wires. If you have the 2G, you only need the small parts kit and will splice the white wire (middle wire). Connect your charge cable and plug it all in. Set the belt tension and tighten everything up, and you're done. Enjoy a job well done and better electrical power.
(if anyone wants to add pics, please do)
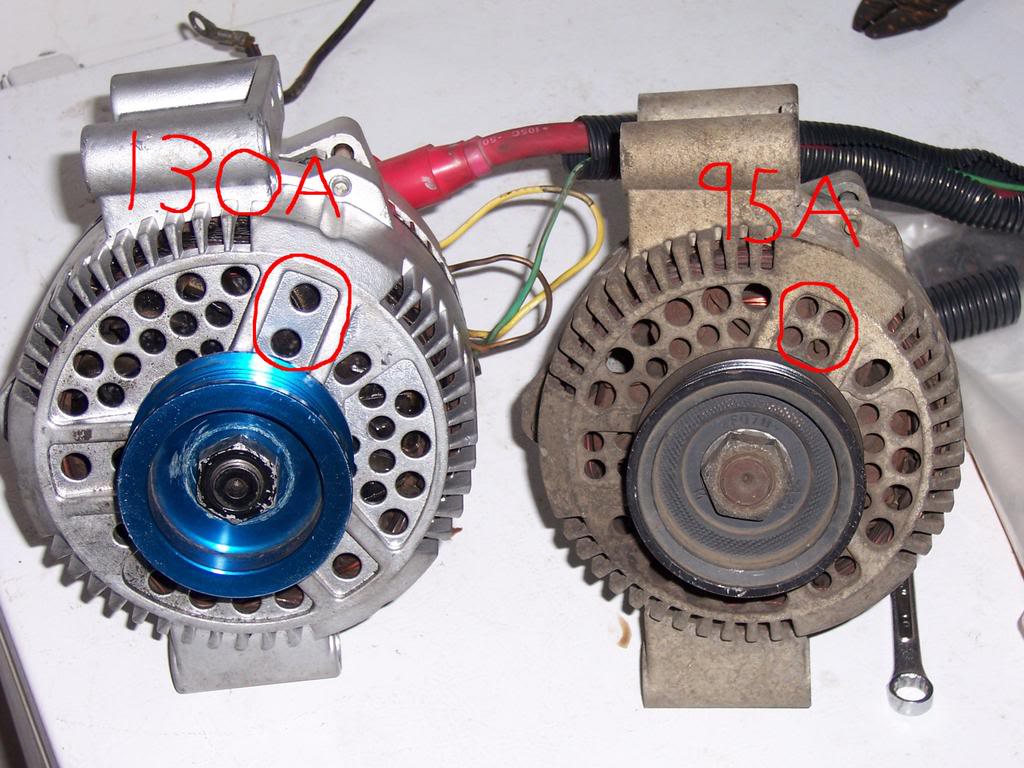
Pic of 130A vs 95A alternator...
Links updated 11/17/2016
Also, check out the swap page: http://www.grandmarq.net/85crownLX/p...lternator.html
very good pics in this thread
You will need a 3G alternator from one of the following vehicles:
93-99 narrow-eared non-DOHC Taurus 3.0L V6 (Vulcan)
94-95 V8 Mustang
94-00 V6 Mustang
94-97 V6 T-Bird/Cougar
95-98 Windstar (3.0L V6 Vulcan)
91-94 V6 Lincoln Continental.
The lower bolt hole on the alternator may need to be drilled out to accept the bolt from your panther, and unless you tap the top hole, you will need to use a bolt/nut arrangement for the top hole.
You may also need to grind the mounting bracket that the lower bolt mounts in to allow greater movement for putting the belt on. This means the crank side of the valley between the tabs that the bolt threads through and clearance the head side tab towards the water pump so the case bolt lump will have more room to move. (post #13 for pics)
Don't feel like alternator hunting in junk yards, then get an all-in-one kit with the alternator and all the small parts needed:
Best bet for handy parts kits is Late Model Restoration's alternator stuff. A couple of other small items are available elsewhere. These are the best deals I've found as of this post.
- small parts kit (if you want to do most of the wiring yourself and know what you're doing - 2G regulator connector will plug into the 3G - but needs modified): http://www.latemodelrestoration.com/...mall-Parts-Kit
- Just the stator plug if you have your own shrink wrap and solder/crimps: https://lmr.com/item/LRS-14290C/94-0...ng-Stator-Plug
- conversion kit (less wiring to do): http://www.latemodelrestoration.com/...onversion-Wire
- 10 foot Charge cable (this can be routed the same way the stock charge cables are - megafuse should be closer to the the battery): https://lmr.com/item/SVE-9902A/Musta...-Suppression-3
- cable boot (cover the nut on the alternator): http://www.delcity.net/store/3:8!in-...ulators/p_1033
- OPTIONAL - Battery post extension: http://store.alternatorparts.com/f1-452-038.aspx (typically less on eBay)
- OPTIONAL (not needed - but may improve longevity on high rev applications) - 6G clutch pulley http://www.nationsstarteralternator....-p/24-2279.htm or http://store.alternatorparts.com/partno242279.aspx
-- Clutch pulley tool (needed to install/remove clutch pulley): http://store.alternatorparts.com/126...nd-r-tool.aspx
Once the alternator is prepped for fitment (bottom bolt hole drilled out if needed, bracket ground down on the crank side to allow greater motion of the new alternator), dry fit the alternator to make sure you're done with that part.
The wiring will depend on if you're upgrading from a 1G or a 2G. There are adapters to make a 1G swap easy, but you can also just splice the wires yourself. Check the wiring diagrams in the first link at the top of this post. If using the swap connector (required for the upgrade from 1G), the wire colors are the same and you just splice the matching wires. If you have the 2G, you only need the small parts kit and will splice the white wire (middle wire). Connect your charge cable and plug it all in. Set the belt tension and tighten everything up, and you're done. Enjoy a job well done and better electrical power.
(if anyone wants to add pics, please do)
Pic of 130A vs 95A alternator...
Links updated 11/17/2016




 Proud owner of a 1989 Crown Victoria
Comment