Ya know, there's companies that do water-pipe re-lining, why not do that for shit like heater cores? I'm a plumber but I know fuck-all about that stuff, I just wonder. Sounds like some cheesy shitass stopgap measure for lazy clowns afraid to do things the right way, but it's got to have some kind of positives if it's actually been done successfully. We could make a good business of it in place of spending a whole goddamned day with the whole dash of our car torn apart. I'll do some research....
 |
Announcement
Collapse
No announcement yet.
Heater Core Write Up
Collapse
This is a sticky topic.
X
X
-
Passages too small. No way to know if the leak is too big for the liner, inability to properly drain the core of excess due to positioning (tubes on top, and in the case of the cvgm cores, its a U-shaped core with both header tanks at the top). Can't ensure a good clean bond. Stupid people using it causing legal headaches when they end up plugging something elsewhere in their cooling system, and most important, poor heat transfer.Ya know, there's companies that do water-pipe re-lining, why not do that for shit like heater cores?
Alex.
Comment
-
Reviving this old thread to say how much I freaking hate photobucket for ruining so many great posts on forums across the web!
Originally posted by VicCrownVic View PostAbout 9 months ago I said I would do a write up for the heater core replacement on my 91 MGM... After a lot of time spent not working on it, I think I've reached the point where I'm ready to post. So here's a test of the length limit for a single post.
The following procedure is based on my own experience replacing the heater core in my 1991 Mercury Grand Marquis. My car has ATC but there shouldn’t be too many differences for a non ATC car.
This procedure can be used as a guide for Mercury Grand Marquis and Ford Crown Victoria model year 1990-1991 (Lincoln Towncars are probably very similar). This guide may be very close to correct for newer models since the 90-91 dash is more similar to the newer models (at least up to 94). For 1989 and older models, look to the beginning of this thread.
This guide is a combination of how I did it and what I would do different next time. The steps can be performed in your own preferred order (where possible). This guide is broken into 3 sections: Driver Side, Engine Bay, and Passenger Side. This guide is not guaranteed to be complete or correct, please add any corrections or suggestions to the thread.
This guide does not imply any level of safety; you are solely responsible for your own safety. This does not mean that there is anything unsafe about the procedure, but that as a non-professional/backyard mechanic I am unable to guarantee any level of safety. If there are any safety precautions that need to be addressed, please add to the thread. (I'm sure GMN probably has some kind of site disclaimer somewhere.)
The airbag system may not need to be disabled for this procedure, but for peace of mind I will mention it. The 1991 Ford Shop Manual says that the airbag system’s backup power supply "is a capacitor that will leak down approximately 15 minutes after the battery is disconnected or in one minute if the battery positive cable is grounded."
Recommended tools:
3/8 inch drive ratchet
A couple of 3/8 inch drive extensions, various lengths
1/4 inch drive ratchet
Small 1/4 inch drive extension
5.5mm socket
7mm or 9/32 socket/nut driver
8mm or 5/16 socket or nut driver
10mm socket
11mm or 7/16 open end wrench
11mm or 7/16 socket
13mm deep-well socket
15mm socket
Phillips head screwdriver
Something small to push the tension clip on the headlight knob (jeweler’s screwdriver, pick, etc.)
Something to pry the gasket/weather strip from the old heater core
optional:
T20 Torx driver
Trim removal tools (some may say this is not optional)
Something to plug the heater core lines to prevent spillage
Driver Side
1. Remove RH and LH lower moldings
These trim pieces should just pull right off.
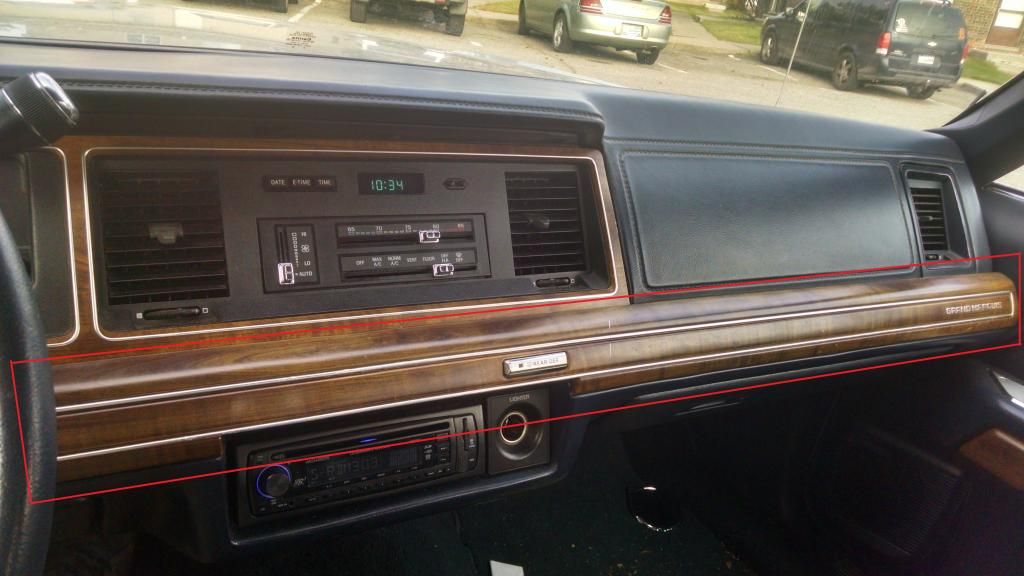
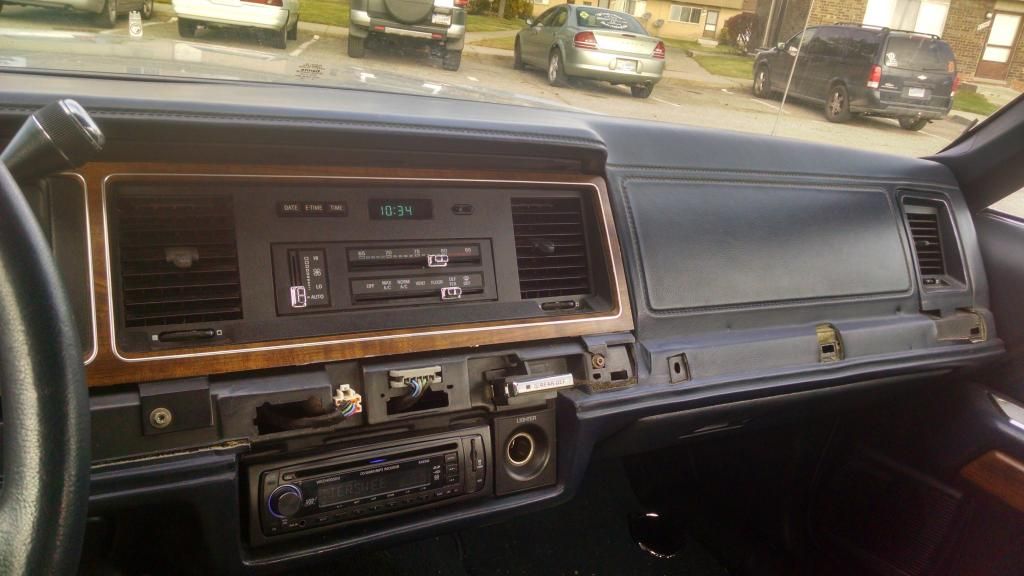
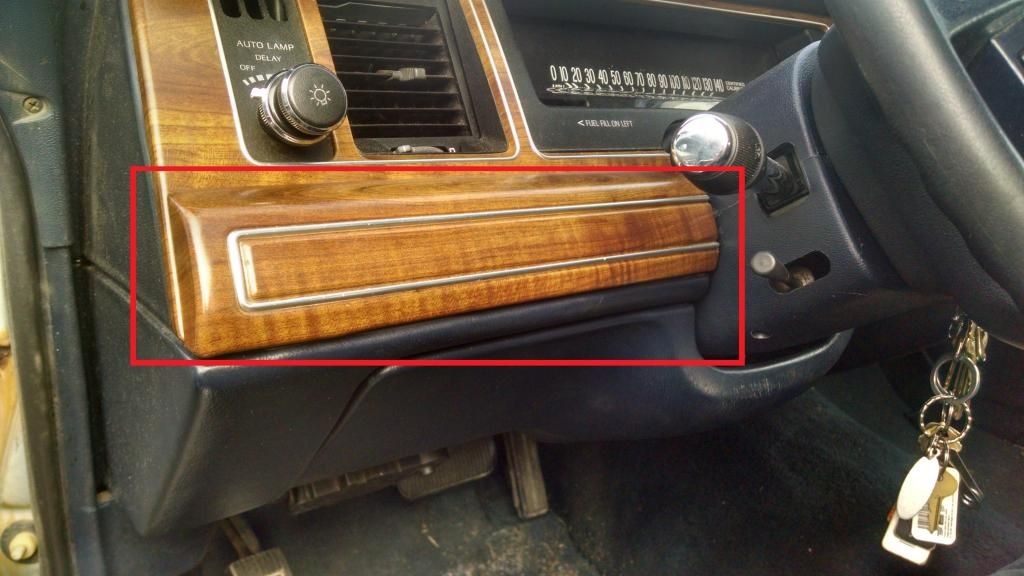
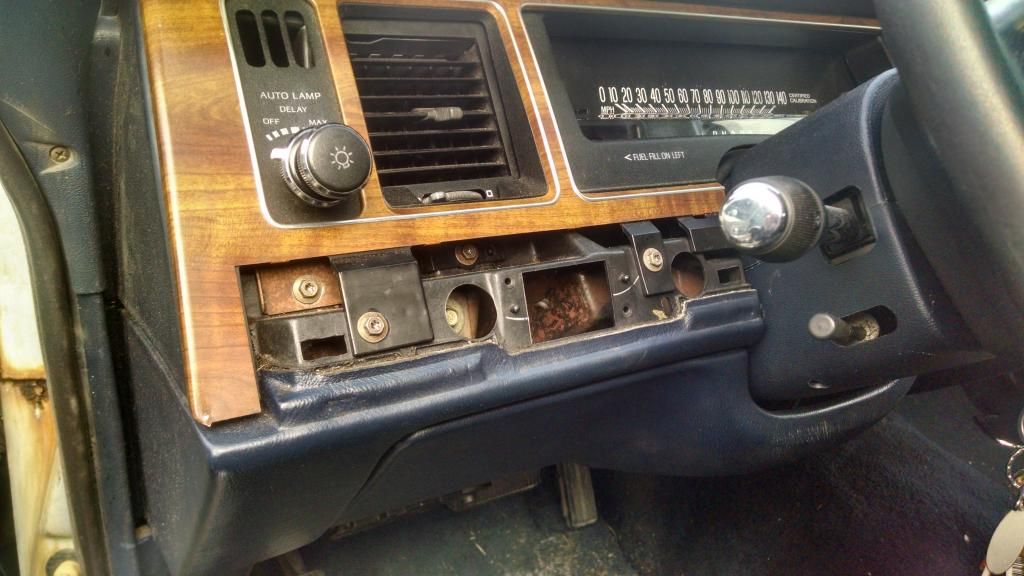
2. Remove the headlight switch knob
Push the tension clip by pushing a small tool, such as a jeweler’s screwdriver, pick, or similar tool into the notch at the base of the headlight knob.
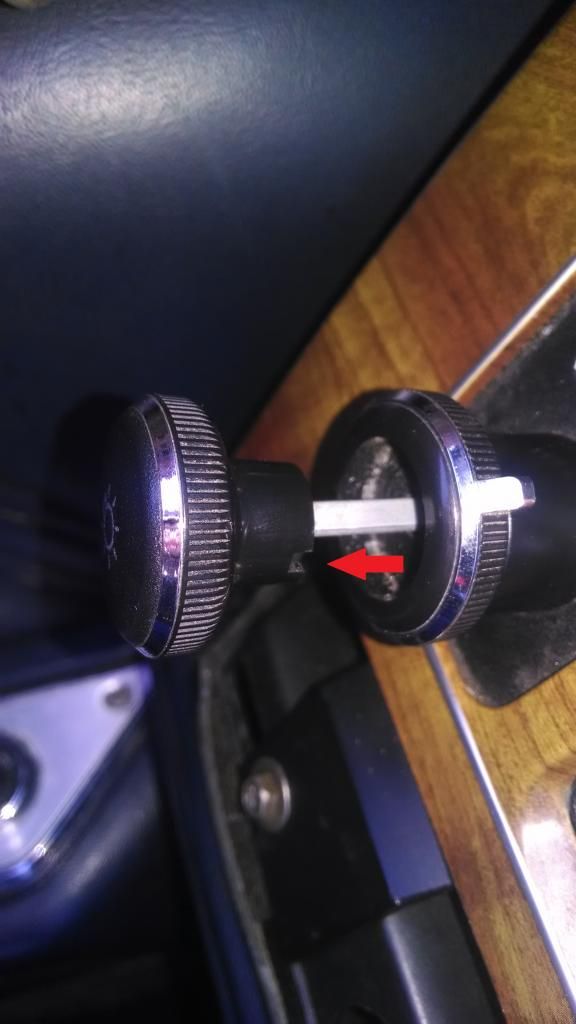
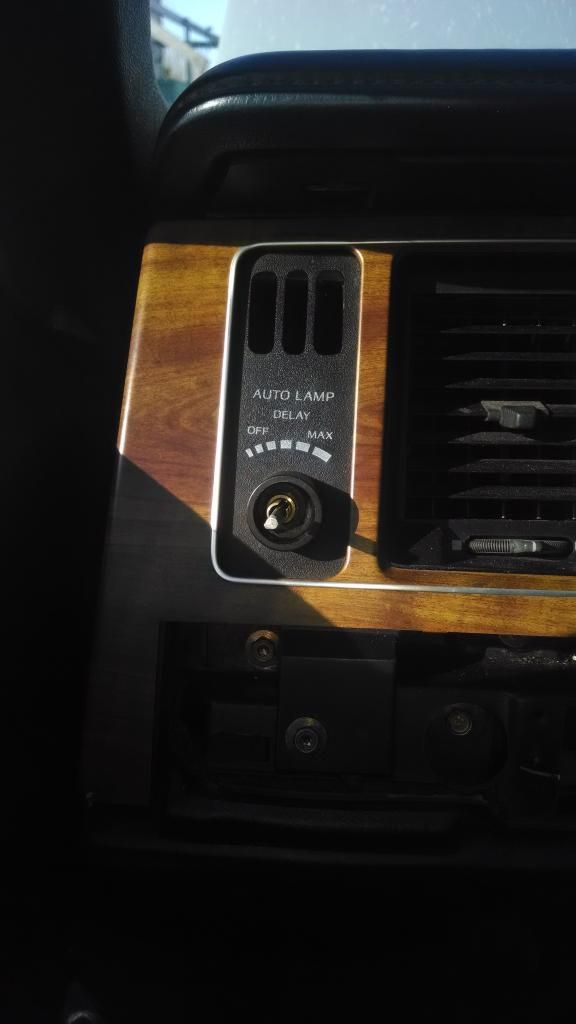
3. Remove the finish panel
There are 8 screws that hold my finish panel on. You can use a T20 Torx driver, a 7mm socket, or a 9/32 socket. The screw directly above the steering column is easier to get at with a socket and a ratchet.
(Pay no attention to the radio being removed in the "after" picture, it does not need to be removed, these pictures were taken a few months apart.)
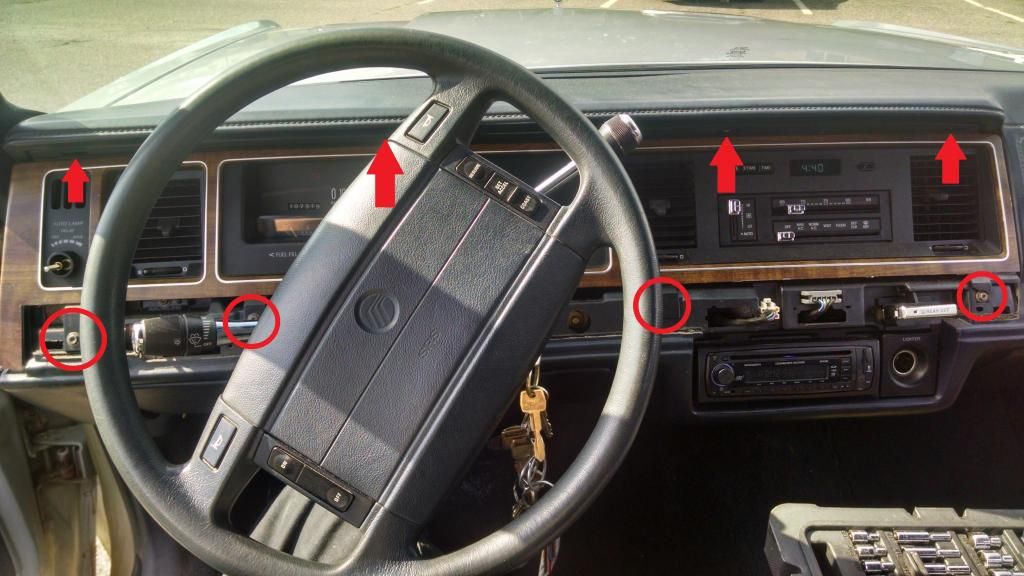
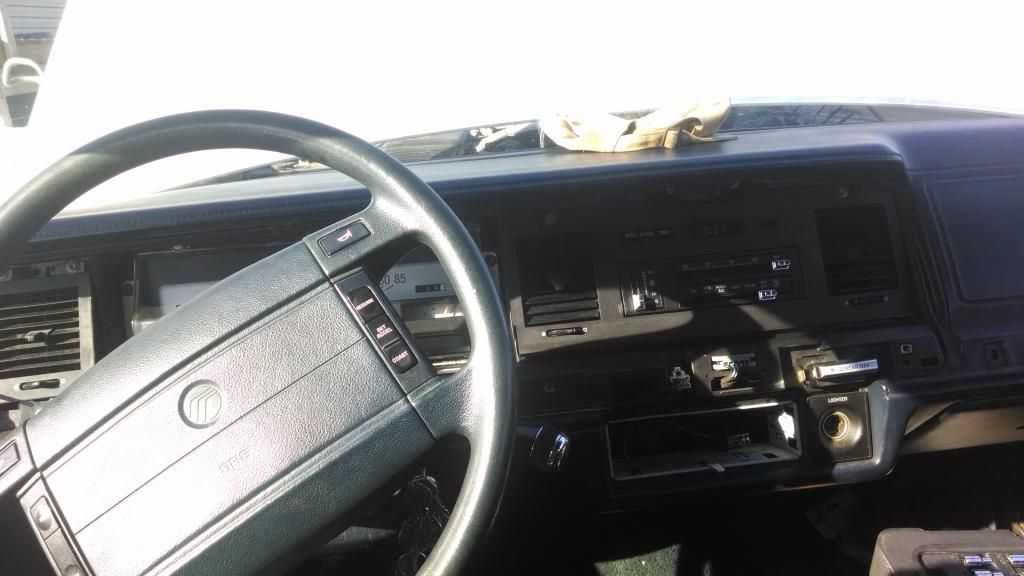
*SNIP*
Comment
-
I've been meaning to get around to editing that post (well, editing and sending to an admin). I think I got as far as copying the entire post but never got around to moving pictures to a new host, so no editing actually ever happened. I have all the original pictures somewhere on one of my computers, so I shouldn't need to wade through all the BS on PB.Vic
~ 1989 MGM LS Colony Park - Large Marge
~ 1998 MGM LS - new DD
~ 1991 MGM LS "The Scab"
~ 1991 MGM GS "The Ice Car"
Comment
-
if someone can send me the pics, I'll just attach them using the forum software. Eliminates the need for hosting bullshit entirely.86 Lincoln Town Car (Galactica).
5.0 HO, CompCams XE258,Scorpion 1.72 roller rockers, 3.55 K code rear, tow package, BHPerformance ported E7 heads, Tmoss Explorer intake, 65mm throttle body, Hedman 1 5/8" headers, 2.5" dual exhaust, ASP underdrive pulley
91 Lincoln Mark VII LSC grandpa spec white and cranberry
1984 Lincoln Continental TurboDiesel - rolls coal
Originally posted by phayzer5
I drive a Lincoln. I can't be bothered to shift like the peasants and rabble rousers
Comment
-
I haven't read the whole thread, but I have some thoughts to add, given that the current status of my 85 is the heater core and air plenum thing are sitting on the rad support:
I did not have to undo any fasteners on the engine side of the firewall except the heater hoses themselves. 3 nuts on the interior side of the firewall: 2 at the bottom, 1 on the top. You do not need to undo those from the engine side, in fact if you do it makes the job harder. I know because I tried, because this thread told me to do it. Edit: upon further thread-skimming, I see I'm not the first to bring this up. Also, the nut on top was accessible without removing the insulation...I removed my insulation after removing the nut, because I was expecting to need to do that. You can push the insulation up tighter against the firewall and the nut becomes visible. Probably varies depending on the exact insulation alignment in your specific vehicle though. There is a retainer for the insulation conveniently located right behind the blend door actuator so there's no good way to get the insulation out first anyway.
Not having door panels installed (adequate substitute...working with the front doors open) allows the dash to come down further with less fuss about the dash hanging up on stuff.
Anyone walking in to this job should also consider fixing (or pre-fixing if not broken yet) the hinges for the vent selection doors since Ford built them as cheap garbage.Last edited by kishy; 02-26-2018, 12:23 PM.
Comment
-
on my 88, the air plenum had studs (flat head, no slot like the base of a toilet bolt) on the cab side and the nuts on the engine side for 2 of them. This is not the same for other years, I'm sure. 90+ do not have that issue due to the firewall redesign. I don't know if other years have that issue. The top nut on my 88 also needed a little of the insulation peeled back to clear it, but that was it. Most of it stayed. These issues may well be different from year to year and car to car (especially the insulation issue).


Only two things are infinite, the universe and human stupidity, and I'm not sure about the former. -- Albert Einstein
rides: 93 Crown Vic LX (The Red Velvet Cake), 2000 Crown Vic base model (Sandy), 2003 Expedition (the vacation beast)
Originally posted by gadget73
... and it should all work like magic and unicorns and stuff.
Originally posted by dmccaig
Overhead, some poor bastards are flying in airplanes.
Comment
-
Order one for an 88. As most if not all parts store listings have the 89 listed for the 90 dash changeover.Originally posted by Mainemantom View PostI have to replace the 89 TC heater core. Does anyone have good or bad comments for quality or fit regarding TYC 96018 or the Spectra 94740 heater cores ?
Comment
-
Thank you for this information !! I ordered both. One for an 88 TC and one for an 89 TC. If the one for the 89 does not fit, it will fit the 90 CV.. For the price, $22 for the 88, $29 for the 89, it does not matter if one sits on the shelf. Update : I got both of the heater cores now. Both are different in style. Having both pressure tested before the work is started.Originally posted by 86VickyLX View PostOrder one for an 88. As most if not all parts store listings have the 89 listed for the 90 dash changeover.

Comment
-
I am fairly certain that (using photos and application data per RockAuto) these are both the 90+ heater core. The 89- one is larger and the input/output tubes are not offset towards one side like the 90+.Originally posted by Mainemantom View PostTYC 96018 or the Spectra 94740
#s for the older cars (listed as up to 88, but community knowledge says up to 89): TYC 96039, Spectra Premium 94620
Comment
-
-
Absolutely, from my 85 wagon thread.Originally posted by mcb82gt View PostAny details how to or pics of what your talking about? Thanks.
Start here at reply 189 to see the failure first identified: http://www.grandmarq.net/vb/showthre...l=1#post810997
In reply 198 you will see my repair.
Comment

Comment