
Horn Button Restoration
1985-1989 Ford LTD Crown Victoria/Mercury Grand Marquis
1985-1989 Ford LTD Crown Victoria/Mercury Grand Marquis
Got a sensitive horn button? They are a pain.
Maybe youĺre just driving down the road with and you unintentionally touch your overly sensitive horn button. A lady on the street thinks youĺre tooting for her, and so does the cop right behind you. Suddenly blue lights flash in your mirror and youĺre going downtown for trying to pick up an undercover cop disguised as a hooker.
How about when it gets cold at night and the vinyl contracts on your overly sensitive horn button. BLEEEEEEEEEEEEEEEEEEEEEEEEP. Wake up! Itĺs 3:14am and your horn is going wide open. Has been for fifteen minutes Now your psycho neighbor is knocking on your door and her son is taking a baseball bat to your freshly waxed Panther.
This is just another way your box is calling out for your attention. Ever since youĺve gotten that new girlfriend, all you do is spend money on her. This leaves precious little for a fuel injected 427 stroker crate motor and that T-56 transmission your pride and joy yearns to have shoved between its fender wells.
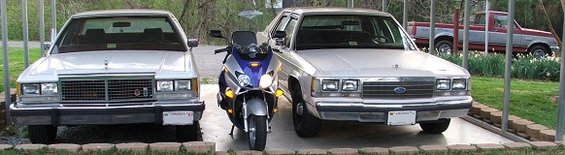
For me, it was the 3:14am wakeup call that woke up two dorms of just settling in for the night college students. I was not a popular person on campus the next day (everyone knows the shagginĺ wagon is mine). I unplugged the horns as a temporary fix, but hereĺs how to really fix your horn button without resorting to one of those cheapo under-the-dash things. Itĺs all due to rotten foam. Replace the foam and problem fixed.
Step 1: Remove your horn button from the car. It just pulls straight out. If your car is a virgin, it might take a little prying. There are two wires that need to be unplugged.
Step 2: Remove the vinyl wrap from the horn button assembly. It slides off. Start on a corner for best results.
Step 3: Now you will have the plastic backing plate and the copper mating surfaces with rotten foam beneath. Your task is to separate the two copper plates. There are small tabs on the connection posts you must squeeze to separate the two halves (see picture). Pliers or a vice make quick work of these.
Step 4: Now the two plates (horn contacts) separate as shown below.
Step 5: Remove the old foam and adhesive. The foam mostly rubbed off with my fingers, but the adhesive took a considerable amount of work to clean off with Goo-Gone. Nothing else would budge it.
Step 6: New Foam! I used some cheap weatherstrip foam made for the doors on houses. It needs to be low-density (aka easy to squish) so that you can squeeze the foam easily for reassembly of the horn button. It is sticky on one side as to adhere to the horn contacts.
Step 7:
Cut the foam and apply as you desire. Do not cover up the raised portions since they need to make contact for your horn to work.
Step 8: Reassemble horn contacts. You will need to push the tabs (on the connection posts) back out that you squeezed earlier to separate the contacts. This is the trickiest part of the operation. It takes some considerable force to bend the tabs out without bending the connection posts. I finally got my tabs back out with some help from an ice pick, a vice, and some creativity. Remember, there has to be an open spot on whatever surface you are working on so that the tab can bend out. The surface must also support the surrounding connection post.
Step 9: This is easy now. Just slide the outer cover back on and plug up the horn button in the car. Reconnect your battery and give it a shot. If it doesnĺt work ľ check your connection posts. Check your fuses, and check your horns (both of mine froze up from not being used while my horn button was on the fritz). Hopefully it will work! If it stays on all the time, your foam wasnĺt thick enough. Good Luck.
Not sure if this works on Lincoln horn buttons. Some of them had a fancier metal thing going on and I havenĺt dissected one yet.
Attached Files
")


Comment